How to Fix a Broken Fishing Rod: Easy DIY Repair Guide 2026
Don’t throw away that broken fishing rod just yet. Most rod damage — from snapped tips to loose guides — can be fixed at home with basic tools and a little patience. This step-by-step guide covers every common fishing rod problem and shows you exactly how to repair it yourself, saving you hundreds of dollars in replacement costs.
You’re halfway through a perfect morning on the water when you hear it — that sickening crack. Your fishing rod just snapped. Your heart sinks. You start mentally calculating the cost of a replacement. But hold on. Before you reach for your wallet, you should know that most broken fishing rods can be fixed at home in under an hour for just a few dollars.
I’ve been repairing fishing rods for over a decade, and honestly, the majority of breaks I see are totally fixable with some epoxy, a little patience, and the right technique. Whether it’s a broken rod tip, a cracked blank, a loose guide, or a damaged ferrule, there’s a DIY solution that works. In this guide, I’ll walk you through every common type of fishing rod damage, show you exactly how to fix it, and help you decide when a repair makes sense versus buying a new rod. Let’s get started.
Key Takeaways
- Most rod breaks are fixable at home: With epoxy, rod thread, and basic tools, you can repair snapped tips, loose guides, and cracked ferrules yourself.
- Identify the type of damage first: The repair method depends entirely on where and how the rod broke — tip breaks, mid-section cracks, and loose guides all require different approaches.
- Quality epoxy is your best friend: Two-part slow-cure epoxy provides the strongest, most durable bond for nearly all fishing rod repairs.
- Prevention saves money: Proper storage, careful transport, and regular inspections can prevent most rod damage before it happens.
- Know when to call it: If the rod is shattered in multiple places or the blank is deeply cracked along its length, replacement may be the smarter option.
- Practice makes perfect: Even first-time DIY rod repairs can last years if you follow the steps carefully and let the epoxy cure fully.
📑 Table of Contents
- Understanding Your Fishing Rod: Anatomy You Should Know
- How to Fix a Broken Fishing Rod Tip
- How to Repair a Cracked or Snapped Rod Blank
- How to Fix Loose or Damaged Rod Guides
- How to Repair a Damaged Ferrule
- Preventing Future Rod Damage
- When to Repair vs. When to Replace
- Essential Tools and Supplies for Rod Repair
- Expert Insights: Tips From Professional Rod Builders
- Conclusion
Understanding Your Fishing Rod: Anatomy You Should Know
Before you can fix a broken rod, you need to understand the basics. Knowing the parts makes diagnosis and repair so much easier.
The Key Parts of a Fishing Rod
Every fishing rod, whether it’s a spinning rod, baitcasting rod, or fly rod, shares the same basic anatomy:
- Blank: The main body of the rod, usually made from graphite, fiberglass, or a composite of both. This is the rod’s backbone.
- Guides: The circular rings (also called eyes) running along the blank that direct your fishing line. They’re typically made from ceramic, titanium, or stainless steel.
- Tip-top: The smallest guide at the very end of the rod. This is the most vulnerable part and the most common break point.
- Ferrule: The connection point where two rod sections join together in multi-piece rods.
- Reel seat: Where your fishing reel attaches to the rod.
- Grip/Handle: Usually made from cork or EVA foam, this is where you hold the rod.
Common Rod Materials and How They Break
Graphite (carbon fiber) rods are lightweight and sensitive but can snap cleanly under sudden impact. Fiberglass rods are more flexible and forgiving, but can develop hairline cracks over time. Composite rods blend both materials and offer a middle ground. Understanding your rod’s material matters because it influences how you approach the repair. If you’re still learning the basics of rod handling, our guide on how to hold a fishing rod is a great place to start — proper grip alone prevents a surprising number of accidents.
How to Fix a Broken Fishing Rod Tip
Visual guide about fishing rod repair
Image source: static.wixstatic.com
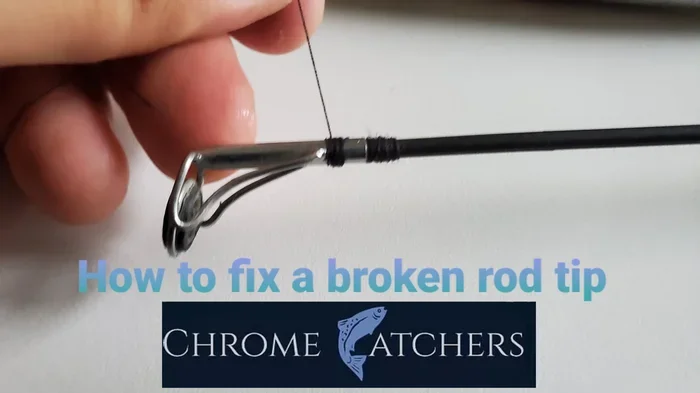
A broken rod tip is the single most common fishing rod repair I encounter. It happens when you swing the rod too hard, slam it in a car door, or snag the tip-top on a rock or dock. The good news? It’s also one of the easiest fixes.
What You’ll Need
- Replacement tip-top (match the tube size to your rod — measure with a rod tip gauge or calipers)
- Two-part slow-cure epoxy (5-minute or 30-minute)
- Rod tip adhesive (optional, for a quicker fix)
- A lighter or a heat gun
- Rubbing alcohol
- A paper towel
Step-by-Step Repair Process
- Remove the old tip-top: Hold a lighter or heat gun a few inches below the broken tip-top for about 10–15 seconds. The glue will soften. Gently twist and pull the old tip-top off the blank. Don’t overheat — you don’t want to damage the rod’s finish.
- Clean the rod blank: Use rubbing alcohol and a paper towel to wipe away any old adhesive residue from the rod’s tip. The surface needs to be clean and dry for the new glue to bond properly.
- Test fit the new tip-top: Slide the replacement tip-top onto the blank without glue first. It should fit snugly. If it’s too tight, you can sand the blank tip lightly. If it’s too loose, add a tiny drop of super glue to build up the surface.
- Apply the epoxy: Mix your two-part epoxy according to the instructions. Apply a thin, even layer to the rod blank tip. Slide the new tip-top into position, making sure it aligns perfectly with the other guides along the rod.
- Let it cure: Set the rod vertically with the tip pointing up. Let the epoxy cure for the full recommended time — usually 4–6 hours for a strong bond. Don’t rush this step.
- Test it out: Once cured, thread your line through the new tip-top and give it a gentle tug. If it holds, you’re back in business.
Quick Tip: Aligning the Tip-Top
Here’s a pro tip that makes a noticeable difference. Before the epoxy sets, hold the rod at eye level and look down the line of guides. The new tip-top should form a perfectly straight line with all the other guides. Even a slight misalignment will cause extra line friction and affect your casting distance.
How to Repair a Cracked or Snapped Rod Blank
Visual guide about fishing rod repair
Image source: anglersdensussex.co.uk
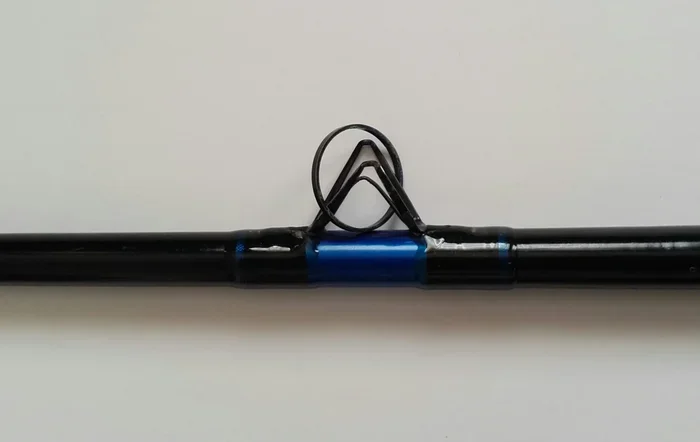
A cracked or snapped blank is more serious than a broken tip, but it’s still very repairable. The key is acting fast — a small crack can become a full break if you keep fishing with it.
Assessing the Damage
First, determine how bad the break is:
- Hairline crack: A thin surface crack that hasn’t fully broken through. This is the easiest to fix.
- Partial break: The rod is cracked through, but the pieces are still somewhat connected.
- Clean snap: The rod has broken into two separate pieces with a clean edge.
- Shattered section: The rod material has splintered and fragmented. This is the hardest to repair and may not be worth the effort.
Repairing a Hairline Crack
- Clean the cracked area with rubbing alcohol.
- Apply a thin bead of slow-cure epoxy along the crack.
- Use a small brush or toothpick to work the epoxy into the crack.
- Wrap the area tightly with rod wrapping thread (available at any tackle shop).
- Apply a thin coat of rod finish or epoxy over the thread wrap.
- Let it cure for 24 hours before using the rod.
Repairing a Clean Snap
- Find a splint: You’ll need a solid rod or dowel that fits inside both broken pieces. A wooden dowel, a section of old fiberglass rod, or even a carbon fiber arrow shaft works well. The splint should be about 3–4 inches long on each side of the break.
- Test fit the splint: Slide the splint inside one half of the broken rod. It should fit snugly but not force the rod open.
- Apply epoxy to the splint: Coat the splint with slow-cure epoxy and insert it into one half of the broken rod.
- Connect the two halves: Slide the other half of the rod onto the exposed splint. Align the guides perfectly.
- Wrap with thread: Wrap rod thread tightly around the break area, extending about an inch past the break on each side.
- Apply rod finish: Coat the thread wrap with epoxy or rod finish. Let it cure for a full 24–48 hours.
Common Mistakes to Avoid
- Using fast-cure superglue instead of epoxy — it’s brittle and won’t hold under fishing stress.
- Skipping the splint on a clean snap — epoxy alone won’t be strong enough.
- Not aligning the guides — misaligned guides ruin casting performance.
- Fishing with the rod before the epoxy fully cures — patience is everything here.
How to Fix Loose or Damaged Rod Guides
Visual guide about fishing rod repair
Image source: i.ytimg.com
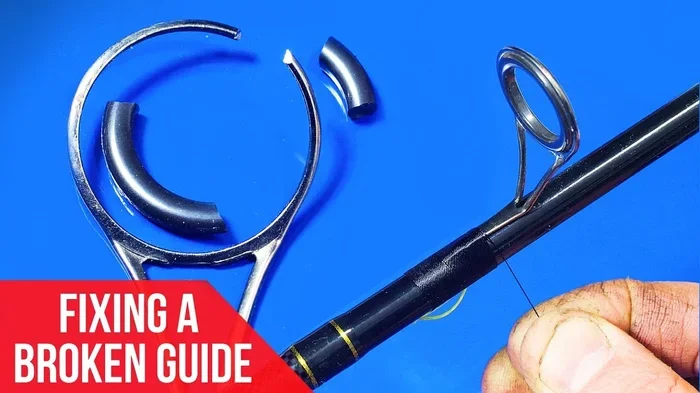
Rod guides can come loose over time, or the ceramic insert can crack from impact. Either way, a loose guide creates friction that weakens your line and ruins your casting.
Identifying Guide Problems
Look for these signs:
- The guide rocks or wiggles on the rod blank.
- The thread wrapping around the guide foot is frayed or missing.
- The ceramic insert inside the guide is cracked or missing a chunk.
- You hear a rattling sound when you shake the rod.
Re-Wrapping a Loose Guide
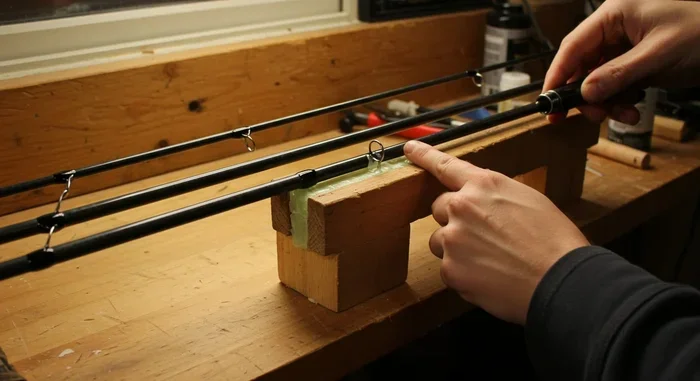
- Remove the old thread: Carefully cut away the existing thread wrapping with a razor blade. Be gentle — you don’t want to scratch the rod blank.
- Clean the area: Remove all old adhesive and thread residue with rubbing alcohol.
- Position the guide: Place the guide back in its original position. Use a small piece of tape to hold it temporarily.
- Start wrapping: Begin wrapping rod thread around one guide foot, starting from the base and working toward the tip of the foot. Keep the wraps tight and even, with no gaps between threads.
- Secure the wrap: Once you’ve wrapped about 1/4 inch, create a loop with the thread, pass the working end through the loop, and pull it tight. This locks the wrap in place.
- Repeat for the other foot: Wrap the second guide foot the same way.
- Apply finish: Coat the thread wraps with rod finish or thin epoxy. Let it cure completely.
Replacing a Cracked Guide Insert
If the ceramic ring inside the guide is cracked, you’ll need to replace the entire guide. Match the guide size and frame style to the original. Remove the old guide, clean the area, and install the new one using the wrapping technique above. If you’re new to rod maintenance, check out our fishing pole rod tips for more guidance on keeping your gear in top shape.
How to Repair a Damaged Ferrule
Ferrules are the connection points on multi-piece rods. They can become loose, cracked, or stuck over time. A bad ferrule affects the rod’s action and can even cause a break during a fight with a fish.
Fixing a Loose Ferrule
A loose ferrule means the male and female sections don’t fit tightly anymore. Here’s how to fix it:
- Clean both ferrule surfaces: Use rubbing alcohol to remove dirt, old wax, and debris.
- Apply ferrule cement or wax: Rub a thin layer of ferrule wax (or even a paraffin candle) onto the male ferrule. This creates a tighter, smoother fit.
- If that’s not enough: Apply a thin coat of slow-cure epoxy to the male ferrule, let it get tacky, then press the sections together. The epoxy fills in the gaps and creates a snug fit. Let it cure for 24 hours.
Fixing a Stuck Ferrule
A stuck ferrule is frustrating but common, especially after saltwater fishing. Never force it — you’ll crack the blank.
- Apply heat: Hold a hair dryer or heat gun on the female ferrule for 30–60 seconds. The heat expands the material slightly.
- Twist gently: While the ferrule is warm, try twisting the two sections apart. Use a rubber glove for a better grip.
- Use the “two-person method”: Have a friend hold one section while you twist the other. This gives you more leverage without bending the rod.
- As a last resort, Place the stuck section in the freezer for an hour. The cold contracts the metal. Then apply heat to the outer ferrule. The temperature difference often breaks the bond.
Replacing a Cracked Ferrule
If the ferrule itself is cracked, replacement is the best option. Carefully heat the old ferrule to soften the adhesive, remove it, clean the blank, and epoxy the new ferrule in place. This is an advanced repair — if you’re unsure, take it to a professional rod builder.
Preventing Future Rod Damage
The best repair is the one you never have to make. A little prevention goes a long way toward keeping your rods in perfect condition.
Proper Storage
- Store rods vertically in a rod rack or horizontally on padded supports. Never lean them against a wall at an angle — the blank can warp over time.
- Use rod socks or protective sleeves to prevent scratches and dings.
- Keep rods away from extreme heat (like a car trunk in summer) and extreme cold.
Safe Transport
- Use a hard rod tube or padded rod case when traveling.
- Never toss rods loose in a truck bed or boat — one bump can snap a tip.
- In a boat, use rod holders and secure rods with Velcro straps.
Regular Maintenance
- Inspect your guides before every trip. Look for cracks, loose wraps, or missing ceramic inserts.
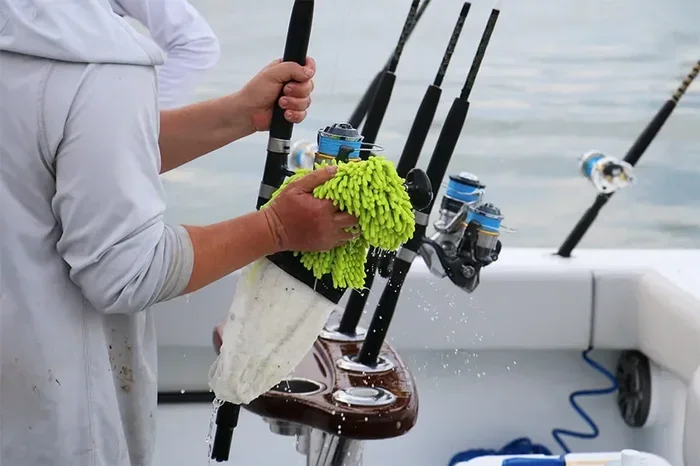
- Wipe down your rod with fresh water after every saltwater trip. Salt corrodes guides and damages finishes.
- Check ferrules for looseness and apply wax regularly.
- Inspect the rod blank for hairline cracks by running your fingers along its length.
For more ways to keep your gear in peak condition, our best fishing tips for every angler cover maintenance habits that extend the life of all your equipment.
When to Repair vs. When to Replace
Not every broken rod is worth fixing. Here’s a simple framework to help you decide.
Repair It When:
- The break is a single clean snap or a broken tip.
- The rod is relatively new or high-quality (worth the repair investment).
- You have the tools and time to do the job right.
- The damage is cosmetic (scratches, chipped finish) rather than structural.
Replace It When:
- The rod is shattered in multiple places along the blank.
- The rod is old, cheap, and a new one costs less than the repair supplies.
- The break is near the reel seat or handle — these areas bear the most stress, and repairs rarely hold.
- You’ve already repaired the same section once before.
Cost Comparison
Here’s a quick look at typical costs:
| Repair Type | DIY Cost | Professional Cost | New Rod Cost |
|---|---|---|---|
| Broken tip-top | $2–$5 | $10–$20 | $30–$300+ |
| Cracked blank (splint) | $5–$15 | $25–$50 | $30–$300+ |
| Loose guide re-wrap | $3–$8 | $15–$30 | $30–$300+ |
| Ferrule replacement | $5–$10 | $20–$40 | $30–$300+ |
As you can see, DIY repairs are almost always the most cost-effective option. Even professional repairs are cheaper than replacing a quality rod.
Essential Tools and Supplies for Rod Repair
If you’re going to do rod repairs at home, you’ll want a basic kit ready to go. Here’s what I recommend keeping on hand:
- Two-part slow-cure epoxy (30-minute cure time gives you more working time)
- Rod wrapping thread in common colors (black, red, blue, gold)
- Rod finish or color preserver for coating thread wraps
- Replacement tip-tops in various sizes (buy an assortment pack)
- Rod guides in a few common sizes
- Rubbing alcohol for cleaning
- A lighter or heat gun for removing old tip-tops
- Small clamps or tape for holding pieces during curing
- Rubber gloves to keep epoxy off your hands
- A rod tip gauge for measuring tip-top sizes
You can find all of these at your local tackle shop or online. A complete rod repair kit typically costs between $15 and $40 and will last for dozens of repairs.
Expert Insights: Tips From Professional Rod Builders
I’ve talked to several professional rod builders over the years, and here’s what they consistently recommend:
- “Always use slow-cure epoxy.” Fast-cure glues are brittle and fail under the repeated stress of casting and fighting fish. Slow-cure epoxy remains slightly flexible, which is exactly what you need.
- “Don’t skip the thread wrap.” On blank repairs, the thread wrap distributes stress across a wider area. Epoxy alone creates a rigid point that’s likely to break again.
- “Match the action.” When splinting a broken blank, the splint material should be similar in flexibility to the original blank. A stiff splint on a flexible rod creates a weak point right at the edge of the repair.
- “Practice on a junk rod first.” If you’ve never wrapped a guide or replaced a tip-top, grab an old rod from a garage sale and practice before working on your favorite setup.
Conclusion
A broken fishing rod doesn’t have to mean the end of your day — or the end of your rod. With a few basic supplies and the techniques in this guide, you can fix broken rod tips, cracked blanks, loose guides, and damaged ferrules right at home. The total cost is usually under $15, and most repairs take less than an hour of active work.
The most important things to remember are: use slow-cure epoxy, align your guides perfectly, and give everything plenty of time to cure before you get back on the water. Rushing a repair is the number one reason fixes fail.
And don’t forget — prevention is always better than repair. Store your rods properly, transport them safely, and inspect them regularly. A few minutes of maintenance can save you hours of repair work and hundreds of dollars in replacement costs.
Now grab that broken rod, pick up some epoxy, and get to work. You’ll be back on the water before you know it.
Frequently Asked Questions
Can you fix a broken fishing rod with superglue?
Superglue (cyanoacrylate) is not recommended for fishing rod repairs. It cures brittle and can’t handle the flex and stress of casting and fighting fish. Use a two-part slow-cure epoxy instead — it remains slightly flexible and creates a much stronger, longer-lasting bond.
How much does it cost to repair a fishing rod?
DIY fishing rod repairs typically cost between $2 and $15, depending on the type of damage. Professional repairs range from $10 to $50. Either option is far cheaper than replacing a quality rod, which can cost anywhere from $30 to $300 or more.
Is it worth fixing an old fishing rod?
It depends on the rod and the damage. If the rod is high-quality and the break is a single clean snap or broken tip, repair is almost always worth it. If the rod is cheap, very old, or shattered in multiple places, replacement is usually the better choice.
How long does epoxy take to cure on a fishing rod?
Most slow-cure epoxies reach handling strength in 30 minutes but need 24 to 48 hours to reach full strength. For the strongest repair, wait a full 48 hours before putting the rod under heavy fishing stress. Temperature and humidity can affect cure times.
Can a snapped fishing rod be repaired?
Yes, a snapped rod can be repaired using an internal splint and epoxy. You insert a dowel or rod section inside both broken pieces, bond it with epoxy, and wrap the area with rod thread. The repair can be nearly as strong as the original rod if done correctly.
What causes fishing rods to break?
The most common causes are impact damage (slamming in car doors, dropping on rocks), high-sticking (lifting the rod too vertically when fighting a fish), improper storage, and normal wear and tear over time. Using the wrong rod for the target species — like a light trout rod for big catfish — also leads to breaks.