How to Clean Fishing Reel: Easy Step-by-Step Guide
Learning how to clean fishing reel is essential for every angler who wants smooth casts and a long-lasting investment. This simple guide breaks down the entire process, from gathering supplies to reassembling your reel, so you can keep your gear in peak condition. Follow these steps, and you’ll avoid corrosion, grit buildup, and expensive replacements.
You just finished a great day on the water. The fish were biting, the weather was perfect, and your gear performed flawlessly. But now, your reel is covered in salt spray, sand, or muddy water. What do you do?
If you’re like many anglers, you might wipe it down and toss it in the garage. But here’s the truth: learning how to clean fishing reel properly is one of the most important skills you can develop. A clean reel casts farther, retrieves smoother, and lasts for years. A neglected one will grind, stick, and eventually fail — often right when you hook the fish of a lifetime.
In this guide, I’ll walk you through the entire process. No confusing jargon. No expensive tools. Just simple, effective steps that anyone can follow. By the end, you’ll know exactly how to keep your reel in top shape, whether you fish freshwater ponds or saltwater surf.
Key Takeaways
- Regular cleaning prevents damage: Salt, sand, and grime are the biggest enemies of your reel. Cleaning after every few trips stops corrosion and keeps internal parts moving freely.
- You don’t need fancy tools: Most cleaning can be done with warm water, mild soap, a soft brush, and a clean cloth. Specialized reel oil and grease are helpful but not mandatory for a basic clean.
- Disassemble with care: Always work in a clean, well-lit area. Take pictures or lay out parts in order to make reassembly easy. Never force anything apart.
- Dry thoroughly before lubricating: Moisture trapped inside a reel will cause rust. Let all parts air dry completely before applying any oil or grease.
- Lubricate strategically: Use thin oil for bearings and moving parts, and heavier grease for gears. Too much lubricant attracts dirt and can actually harm performance.
- Test before your next trip: After reassembly, spin the handle and check for smooth operation. A quick test at home can save you frustration on the water.
- Consistency is key: A 15-minute clean after a saltwater session is far better than a deep clean once a year. Make it a habit.
📑 Table of Contents
Why Cleaning Your Fishing Reel Matters
Your fishing reel is a precision machine. Inside that compact body, dozens of tiny gears, bearings, and springs work together to cast your line and retrieve fish. Even a tiny grain of sand can throw everything out of whack.
Cleaning your fishing reel isn’t just about looks. It’s about performance and longevity. Here’s why it’s so important:
- Prevents corrosion: Saltwater is especially harsh. It eats away at metal parts, causing rust and pitting. Freshwater can also cause problems if dirt and debris are left to dry.
- Maintains smooth operation: Clean parts move freely. Dirty parts create friction, which makes casting harder and retrieval choppy.
- Extends reel life: A well-maintained reel can last decades. A neglected one might not make it through a single season.
- Saves money: Replacing a reel is expensive. Cleaning it costs almost nothing. A little time now can save you hundreds of dollars later.
- Improves fishing success: A smooth reel means better casts, more accurate presentations, and stronger hooksets. That translates to more fish.
Think of it like changing the oil in your car. It’s a simple task that prevents major problems down the road. The same logic applies to your reel.
What You’ll Need to Clean Your Reel
Before you start, gather your supplies. Most of these items are probably already in your home. You don’t need a specialty kit, though one can be helpful.
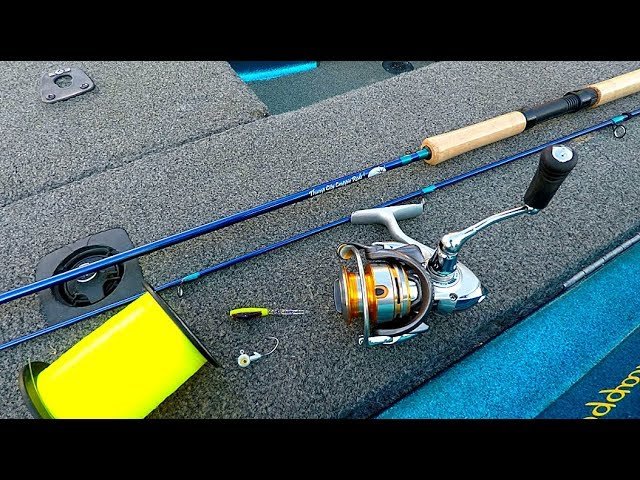
Visual guide about cleaning fishing reel close-up
Image source: i.ytimg.com
Essential Cleaning Supplies
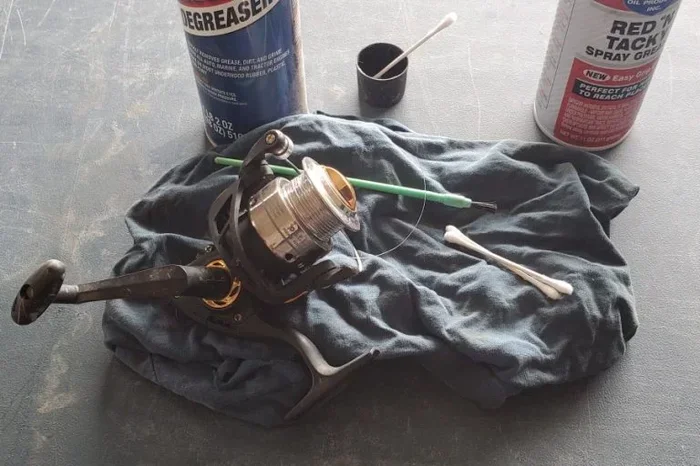
- Clean, soft cloths: Microfiber cloths work great. Avoid paper towels, which can leave lint.
- Mild dish soap: Dawn or a similar gentle soap works well. Avoid harsh detergents.
- Warm water: Not hot, which can damage seals and lubricants.
- Small brush: An old toothbrush is perfect. A soft-bristled paintbrush also works.
- Cotton swabs: Great for reaching tight spots and cleaning inside small parts.
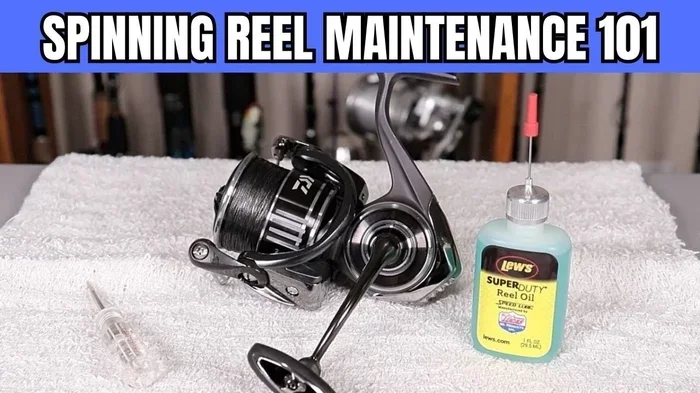
- Reel oil: A light, high-quality oil for bearings and moving parts. Avoid WD-40, which is a solvent, not a lubricant.
- Reel grease: A heavier grease for gears. This provides long-lasting protection.
- Screwdrivers: Small, precision screwdrivers that fit your reel’s screws. Many reels use Phillips or flathead screws.
- Small container: A plastic tray or a magnetic parts mat to hold screws and small parts.
Optional but Helpful Items
- Reel cleaning tool: Some brands sell specific tools for removing spools and handles.
- Compressed air: Useful for blowing out dust and water from tight spaces.
- Parts diagram: Many manufacturers provide exploded views online. Print one for your reel model.
Quick Tip: Lay out a clean towel on your work surface. This catches dropped screws and prevents small parts from rolling away.
How to Clean Fishing Reel: Step-by-Step Guide
Now for the main event. Follow these steps carefully, and your reel will feel like new. I’ll cover both a basic external clean and a deeper internal clean. Start with the external clean after every few trips. Do the full internal clean once or twice a season, or anytime you get your reel wet in saltwater.
Visual guide about cleaning fishing reel close-up
Image source: mountaintrailsfishing.com
Step 1: Prepare Your Workspace
Find a clean, well-lit area. A kitchen table or workbench works well. Lay down your towel and arrange your supplies. Take a photo of your reel before you start. This helps you remember how everything goes back together. If you’re new to this, consider taking pictures at each disassembly step.
Step 2: Remove the Spool
Most spinning reels have a spool that comes off easily. Look for a small knob or button on top of the spool. Turn it counterclockwise or press it, then lift the spool straight up. For baitcasting reels, you may need to remove the side plate first. Consult your reel’s manual if you’re unsure.
Common Mistake: Forcing the spool off. If it doesn’t come easily, check for a locking mechanism or a screw you missed.
Step 3: Rinse with Fresh Water
If your reel was exposed to saltwater or dirty water, rinse it with fresh water. Use a gentle stream from a faucet or a spray bottle. Do not use high pressure, which can force water into sealed bearings. Focus on the outside and the spool area. This step removes the bulk of salt, sand, and debris.
Step 4: Clean the Exterior
Dip your cloth in warm, soapy water and wring it out well. Wipe down the entire reel body, handle, and bail arm. Use your small brush to scrub crevices and around the line roller. Pay special attention to the area where the line comes off the spool. Dirt builds up there and can damage your line.
For stubborn grime, use a cotton swab dipped in soapy water. Work slowly and carefully. Rinse the cloth frequently to avoid spreading dirt.
Step 5: Clean the Spool
Remove any remaining line from the spool if it’s old or damaged. This is a great time to replace your line. Wash the spool itself with soapy water and a cloth. Rinse thoroughly and set it aside to dry. If you’re keeping the old line, be careful not to get soap on it.
Step 6: Disassemble for Deep Cleaning (Optional but Recommended)
For a thorough clean, you’ll need to open the reel. Use your screwdrivers to remove the side plate(s). Work slowly and keep track of every screw. Place them in your small container. Once the side plate is off, you’ll see the gears and internal mechanisms.
Expert Insight: Not all reels are designed for full disassembly. If your reel has sealed bearings or complex internal systems, stick to the external clean. When in doubt, consult your manual or a professional.
Step 7: Clean Internal Parts
Use your brush and cotton swabs to gently remove old grease, dirt, and debris from the gears and internal surfaces. Avoid using soap on internal parts unless they are very dirty. If you do, rinse very lightly and dry immediately. Compressed air can help blow dust out of tight corners.
Common Mistake: Using too much water inside the reel. Moisture is the enemy. Keep internal cleaning as dry as possible.
Step 8: Dry Everything Completely
This step is critical. Use a clean, dry cloth to wipe down every part. Let all parts air dry for at least 30 minutes. Don’t rush this. Any moisture left inside will cause rust and corrosion.
Step 9: Lubricate Moving Parts
Now it’s time to oil and grease. Apply a tiny drop of reel oil to each bearing and pivot point. Common spots include the handle knob, the bail hinge, and the line roller. For the gears, apply a small amount of reel grease. Use a toothpick or a small brush to spread it evenly. Less is more. Excess lubricant will attract dirt and gum up the works.
Quick Tip: Refer to your reel’s manual for specific lubrication points. Some reels have sealed bearings that don’t need oil.
Step 10: Reassemble and Test
Put everything back together in reverse order. Refer to your photos if needed. Tighten screws gently — don’t overtighten, which can strip threads. Once assembled, spin the handle. It should feel smooth and quiet. Test the drag by pulling line from the spool. It should engage smoothly without sticking.
If something feels off, double-check your work. A part might be misaligned or a screw might be loose.
Common Mistakes to Avoid When Cleaning Your Reel
Even experienced anglers make errors. Here are the most common pitfalls and how to avoid them.
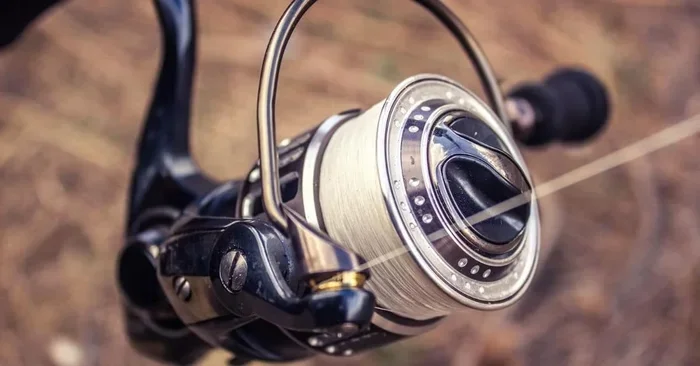
Visual guide about cleaning fishing reel close-up
Image source: tackleboxtalk.com
- Using WD-40 as a lubricant: WD-40 is a solvent and water displacer, not a lubricant. It will wash away existing grease and leave parts dry. Use proper reel oil and grease instead.
- Overtightening screws: Screws in reels are small and delicate. Tighten until snug, then stop. Overtightening can strip the threads or crack plastic parts.
- Skipping the drying step: Moisture trapped inside is a recipe for rust. Always let parts air dry completely before reassembling.
- Using too much lubricant: A little goes a long way. Excess oil and grease attract dirt and can cause the reel to feel sluggish.
- Forgetting the line roller: This small part is often overlooked. A dirty line roller can fray your line and cause casting problems.
- Not consulting the manual: Every reel is different. The manual provides specific instructions for your model.
How Often Should You Clean Your Fishing Reel?
The frequency depends on how and where you fish. Here’s a simple guideline.
| Fishing Condition | External Clean | Deep Clean |
|---|---|---|
| After every saltwater trip | Yes | Every 2-3 trips |
| After freshwater trips in muddy or sandy water | Yes | Every 5-6 trips |
| After freshwater trips in clean water | Every 2-3 trips | Once a season |
| After heavy use (tournaments, long sessions) | After each use | Monthly |
| During storage (off-season) | Before storing | Before first trip of new season |
Key Takeaway: When in doubt, clean it. A quick rinse and wipe takes five minutes and can prevent major problems.
Maintaining Your Reel Between Deep Cleans
You don’t need to do a full disassembly every time. Simple maintenance between deep cleans keeps your reel running smoothly.
- Rinse after saltwater: Use fresh water to rinse the reel’s exterior. Dry with a cloth.
- Check the line roller: Spin it with your finger. If it’s sticky, clean it with a cotton swab and a drop of oil.
- Inspect the drag: Pull line to feel if the drag is smooth. If it’s jerky, it might need cleaning or new grease.
- Store properly: Keep your reel in a cool, dry place. Avoid direct sunlight and extreme heat. Use a reel cover if you have one.
- Loosen the drag before storage: This relieves pressure on the drag washers and prevents them from flattening over time.
When to Seek Professional Help
Sometimes, a DIY clean isn’t enough. If you encounter any of these issues, consider taking your reel to a professional repair shop.
- Grinding or clicking noises: This could indicate a broken gear or bearing.
- Drag that won’t tighten or loosen: Internal drag components may be worn or damaged.
- Handle that won’t turn smoothly: This might be a seized bearing or a bent shaft.
- Water inside the reel body: If you see moisture after cleaning, seals may be compromised.
- Stripped screws or broken parts: These require replacement parts and specialized tools.
A professional clean typically costs $20-$50, depending on the reel and the work needed. It’s a worthwhile investment for high-end reels.
Conclusion
Learning how to clean a fishing reel is a simple skill that pays huge dividends. It keeps your gear performing at its best, extends its lifespan, and saves you money on replacements. Whether you’re a casual weekend angler or a dedicated tournament fisherman, a clean reel is a happy reel.
Remember the key steps: rinse, clean, dry, lubricate, and test. Make it a habit after every few trips, and especially after saltwater use. Your future self — and the fish you catch — will thank you.
Now, grab your supplies and give your reel the care it deserves. Tight lines!
Frequently Asked Questions
Can I use WD-40 to clean my fishing reel?
No, WD-40 is not recommended for cleaning or lubricating fishing reels. It is a solvent that can strip away existing lubricants, leaving parts dry and prone to wear. Instead, use a mild soap and water for cleaning, and apply reel-specific oil and grease for lubrication.
How often should I deep clean my fishing reel?
For most anglers, a deep clean once or twice a season is sufficient. If you fish in saltwater frequently, clean it more often — every two to three trips. For freshwater use, once at the start and once at the end of the season is usually enough.
What happens if I don’t clean my fishing reel?
Neglecting to clean your reel leads to buildup of salt, sand, and grime. This causes corrosion, rough casting, and sticky drag. Over time, internal parts can seize or break, leading to expensive repairs or the need for a new reel.
Do I need to remove the line before cleaning the reel?
It’s not mandatory, but it’s highly recommended. Removing old or damaged line gives you better access to the spool and internal parts. It also allows you to inspect the spool for damage and replace the line if needed.
Can I clean a baitcasting reel the same way as a spinning reel?
The basic principles are the same, but baitcasting reels are more complex. They have more internal parts and require careful disassembly. Always consult your reel’s manual before taking apart a baitcaster. If you’re unsure, stick to an external clean or seek professional help.
What is the best way to dry my reel after cleaning?
After rinsing and wiping with a dry cloth, let all parts air dry for at least 30 minutes. Place them on a clean towel in a warm, dry area. You can also use compressed air to blow out moisture from tight spaces. Never use a hair dryer, as high heat can damage seals and plastic parts.