How to Make a Fishing Pole: A Simple DIY Guide 2026
How to make a fishing pole is easier than you think. This guide covers everything from choosing materials to assembling your own DIY fishing pole. Whether you want a bamboo fishing rod or a PVC option, you’ll find clear steps and practical advice to create a functional, custom rod.
Have you ever wanted to create your own fishing gear? Making a fishing pole from scratch is a rewarding project that connects you to the sport more deeply. Whether you’re a beginner or an experienced angler, building a DIY fishing pole lets you customize every detail to match your fishing style.
In this guide, we’ll walk you through the entire process of making a fishing pole. You’ll learn about different materials, the tools you need, and step-by-step assembly instructions. By the end, you’ll have a functional homemade fishing rod ready for the water. Let’s dive in!
Key Takeaways
- Choose the right material: Bamboo, PVC, or fiberglass each has unique benefits for your DIY fishing pole.
- Understand rod parts: Know the tip, guides, reel seat, and handle to build a balanced fishing rod.
- Follow a simple assembly process: From cutting to finishing, each step matters for a durable homemade fishing rod.
- Customize for your needs: Adjust length, action, and grip to match the fish you target and your casting style.
- Test and tweak: After building, check the rod’s performance and make small adjustments for better casting and control.
- Save money and learn skills: Making your own fishing pole is budget-friendly and teaches you valuable rod-building techniques.
- Stay safe: Use proper tools and protective gear when cutting or shaping materials.
📑 Table of Contents
- Why Build Your Own Fishing Pole?
- Materials You Can Use for a DIY Fishing Pole
- Tools and Supplies You’ll Need
- Step-by-Step: How to Make a Fishing Pole
- Common Mistakes When Making a Fishing Pole
- Expert Tips for a Better DIY Fishing Rod
- How to Set Up Your New Fishing Pole
- Maintaining Your Homemade Fishing Rod
- Conclusion
Why Build Your Own Fishing Pole?
Building your own rod isn’t just about saving money. It’s about understanding how a fishing pole works and tailoring it to your needs. When you make a fishing pole yourself, you control the length, action, and grip. You also gain skills that help you repair and maintain rods in the future.
Plus, it’s a fun weekend project. You can involve friends or family, and the sense of accomplishment when you catch your first fish on a rod you built is unmatched.
Cost Comparison: DIY vs. Store-Bought
Let’s look at a quick comparison table to see the financial side.
| Type | Average Cost | Customization | Durability |
|---|---|---|---|
| Bamboo DIY pole | $10–$20 | High | Good with care |
| PVC DIY rod | $15–$30 | Medium | Very durable |
| Store-bought beginner rod | $30–$60 | Low | Varies |
| High-end custom rod | $100+ | Extreme | Excellent |
As you can see, how to make a fishing pole can save you significant money while giving you a unique tool.
Materials You Can Use for a DIY Fishing Pole
The first decision in making a fishing pole is choosing the material. Each option has pros and cons.
Bamboo Fishing Rod
Bamboo is a classic choice. It’s lightweight, flexible, and gives a traditional feel. You can harvest bamboo from your yard or buy dried poles. Bamboo works well for homemade fishing rods for panfish and trout. However, it requires more preparation—drying, straightening, and sealing.
If you want to learn more about this specific method, check out our detailed guide on how to make a bamboo fishing rod. That article covers the entire process from selecting bamboo to finishing the rod.
PVC Pipe Fishing Rod
PVC is modern and super durable. It’s great for beginners because it’s easy to cut and shape. A PVC fishing pole can handle larger fish and rough handling. The downside is that it’s heavier than bamboo or fiberglass. Still, it’s a fantastic option for a DIY fishing pole that lasts.
Fiberglass or Graphite Blank
If you want a more professional build, you can buy a rod blank (the bare shaft) from a tackle shop. Fiberglass is tough and affordable; graphite is lighter and more sensitive. Building from a blank involves attaching guides, a reel seat, and a handle. This method requires more tools but yields a high-quality custom fishing rod.
Other Materials
You can also use tree branches, old broom handles, or even metal tubing. The key is to find something straight, strong, and slightly flexible. For a true homemade fishing rod, creativity is your friend.
Tools and Supplies You’ll Need
Before you start making a fishing pole, gather these items:
- Material: Bamboo, PVC pipe, or rod blank
- Cutting tool: Hacksaw, pruning shears, or pipe cutter
- Sandpaper: For smoothing edges
- Measuring tape: To get the right length
- Drill and bits: For making holes in PVC or attaching guides
- Epoxy or strong glue: For securing components
- Fishing line guides (eyes): Small rings that guide the line
- Reel seat: The part that holds the reel
- Handle material: Cork, foam, or rubber tubing
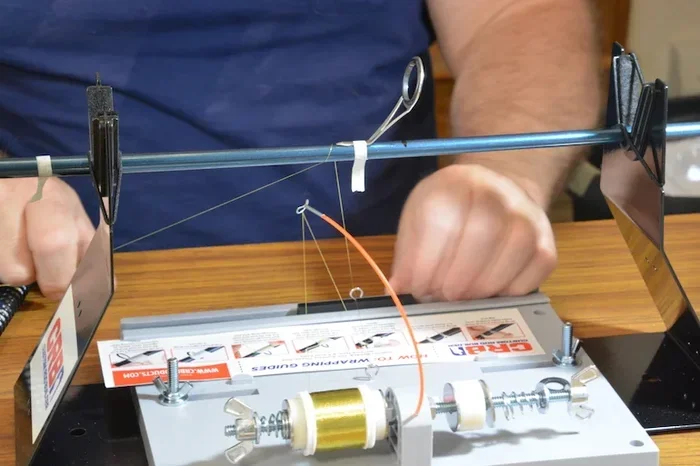
- Thread or wire: For wrapping guides
- Clear coat or varnish: For protection
Most of these items are available at hardware stores or online. If you’re using bamboo, you might also need a heat source for straightening.
Visual guide about DIY fishing pole construction
Image source: content.osgnetworks.tv
Visual guide about DIY fishing pole construction
Image source: content.osgnetworks.tv
Step-by-Step: How to Make a Fishing Pole
Now let’s get to the main part. Follow these steps to make a fishing pole that works.
Step 1: Choose and Prepare Your Material
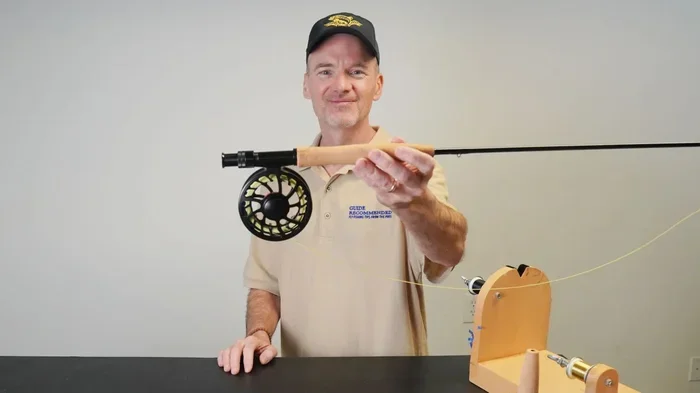
If using bamboo, cut a straight section about 6–8 feet long. Remove any branches and sand the nodes smooth. For PVC, cut a 1/2-inch or 3/4-inch pipe to your desired length (6–7 feet is common for general fishing). Sand the ends to remove burrs.
Visual guide about DIY fishing pole construction
Image source: guiderecommended.com
Step 2: Shape the Rod (Optional)
Bamboo rods often benefit from being slightly tapered. You can taper the tip by sanding the last few inches to make it thinner and more flexible. For PVC, you can heat the tip and squeeze it slightly to create a taper, but this is optional.
Step 3: Attach the Guides (Line Eyes)
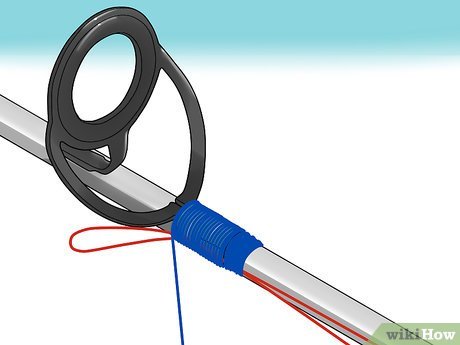
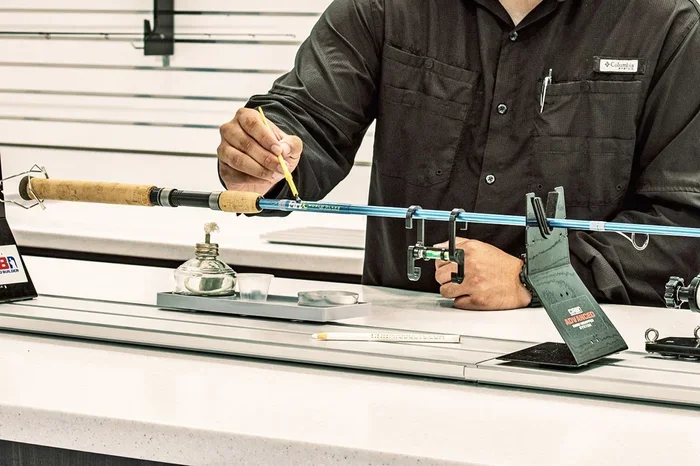
Guides are the rings that the fishing line passes through. Space them evenly along the rod, starting about 6 inches from the tip and ending near the handle. Use epoxy or strong glue to attach each guide. For a simple DIY fishing pole, you can even use small screw eyes from a hardware store.
Step 4: Install the Reel Seat
The reel seat holds your fishing reel. You can buy a pre-made reel seat or make one from a hose clamp and a piece of cork. Glue it onto the rod about 12–18 inches from the butt end. Make sure it’s secure and aligned with the guides.
Step 5: Create the Handle
Wrap cork tape or foam around the butt end of the rod. Start just below the reel seat and go down to the bottom. This gives you a comfortable grip. You can also use a bicycle handlebar grip for a quick solution.
Step 6: Wrap the Guides with Thread
For a clean look and extra strength, wrap thread around the base of each guide. Use a simple whip finish. Then apply a thin layer of epoxy or clear nail polish to seal the wraps. This step is crucial for a durable homemade fishing rod.
Step 7: Apply a Protective Finish
If using bamboo or wood, apply a coat of varnish or polyurethane to protect against moisture. For PVC, you can skip this or add a coat of paint for aesthetics.
Step 8: Attach the Tip Guide
The tip guide is the smallest ring at the very end of the rod. Glue it securely. This guide takes the most stress during casting.
Step 9: Let Everything Cure
Allow all glue and finishes to dry completely, usually 24 hours. Then you’re ready to string the rod.
Step 10: String the Rod
Thread your fishing line through the guides, starting from the tip down to the reel seat. Tie the line to the reel spool. If you need help with this step, see our guide on how to restring a fishing rod.
Now you have a complete DIY fishing pole! Take it outside and test the balance and casting action.
Common Mistakes When Making a Fishing Pole
Avoid these pitfalls to ensure your homemade fishing rod performs well.
- Uneven guide spacing: Guides that are too far apart cause line slap. Keep spacing tight near the tip.
- Weak glue joints: Use epoxy designed for rod building. Hot glue can fail under stress.
- Wrong rod length: A very long rod is hard to cast in tight spots. Stick to 6–7 feet for versatility.
- Skipping the finish: Unsealed bamboo or wood will rot quickly. Always apply a protective coat.
- Ignoring the reel seat alignment: If the reel seat is crooked, the line won’t run straight through the guides.
Expert Tips for a Better DIY Fishing Rod
Here are some insider secrets to improve your fishing pole making skills.
- Use a rod building kit: Kits include all parts and make the process simpler for beginners.
- Test the action before finishing: Hold the rod and wiggle it. A good action means the tip bends smoothly while the butt stays stiff.
- Add a hook keeper: Glue a small ring near the handle to store your hook when not fishing.
- Consider the fish species: For panfish, a light action is fine. For bass or catfish, go with a medium or heavy action.
- Learn from others: Watch YouTube videos or join online forums for rod building tips.
How to Set Up Your New Fishing Pole
Once your DIY fishing pole is built, you need to set it up correctly. This includes attaching the reel, tying on a hook, and adding a bobber or sinker if needed. For a complete walkthrough, read our article on how to set up a fishing rod. It covers everything from line selection to knot tying.
Maintaining Your Homemade Fishing Rod
Proper care extends the life of your homemade fishing rod. After each trip, rinse it with fresh water, especially if you fished in saltwater. Dry it thoroughly before storing. Check guides for cracks or loose wraps. Apply a light coat of oil to metal parts to prevent rust.
If your rod ever breaks, don’t worry. You can often repair it. Learn how to fix a broken fishing rod in our dedicated guide.
Conclusion
Making your own fishing pole is a fulfilling project that saves money and gives you a custom tool. By following this guide on how to make a fishing pole, you’ve learned the materials, steps, and tips to create a functional DIY fishing pole. Whether you chose bamboo, PVC, or a blank, the result is a rod that reflects your effort and style.
Now it’s time to hit the water. Test your new rod, make small adjustments if needed, and enjoy the pride of catching fish on your own creation. Remember, practice makes perfect. The more you build, the better your homemade fishing rod will become.
Happy fishing, and tight lines!
Frequently Asked Questions
What is the easiest material for a DIY fishing pole?
PVC pipe is the easiest material for beginners. It’s cheap, easy to cut, and requires minimal preparation. You can assemble a simple PVC fishing pole in under an hour with basic tools.
How long should a homemade fishing pole be?
A length of 6 to 7 feet is ideal for most freshwater fishing. Shorter poles (4–5 ft) work well for kids or small creeks, while longer poles (8–10 ft) are better for surf casting or fly fishing.
Can I use a tree branch as a fishing pole?
Yes, a straight, flexible tree branch can work as a temporary fishing pole. Look for green wood that bends without snapping. Remove bark and side twigs, then attach a line and hook. It won’t last long, but it’s a great survival trick.
Do I need a reel seat on a DIY fishing pole?
Not necessarily. For a simple cane pole, you can tie the line directly to the tip. But if you want to use a spinning or baitcasting reel, a reel seat is essential to hold the reel securely.
How do I make my homemade fishing rod more sensitive?
Use a lightweight material like graphite or thin bamboo. Also, keep the rod length moderate (6–7 ft) and use small, lightweight guides. A sensitive tip helps you feel even the lightest bites.
Can I paint my DIY fishing pole?
Yes, you can paint PVC or sealed bamboo. Use spray paint designed for plastic or outdoor use. For bamboo, apply a primer first. Painting adds personality and extra protection.