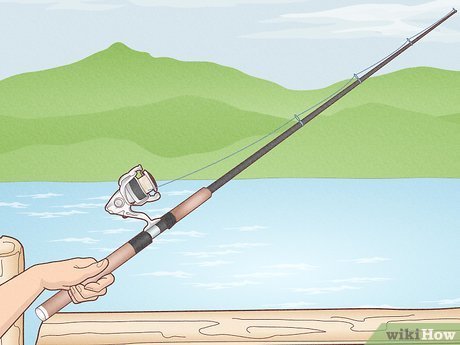
How To Read A Lake For Fishing: Find Fish Fast
Reading a lake for fishing means learning to see more than open water. A lake may look calm and empty, yet small changes in depth, cover, water color, wind, and temperature can reveal where fish feed and rest. The goal is not to cast at random. The goal is to build a simple picture of the lake and then test the most likely spots.
This skill helps with bass, trout, walleye, catfish, panfish, and many other freshwater species. It also helps from shore, a boat, a kayak, or through the ice. You do not need an expensive fish finder to begin. A map, polarized sunglasses, a depth estimate, and careful observation can teach you a great deal.
Think of a lake as a three-dimensional neighborhood. Fish use some areas as homes, some as feeding grounds, and others as travel routes. Your job is to find the edges between those areas. An edge may be a weed line, a drop-off, a creek channel, a shade line, a rock pile, or a change in water temperature.

The quick answer: find structure, depth, food, and the right conditions
To read a lake for fishing, start with a map and identify points, coves, creek channels, drop-offs, flats, weed beds, rocks, docks, and inflowing water. Then study wind, light, water clarity, temperature, and current. Fish the edges where deep water meets shallow water, cover meets open water, or moving water meets still water. Test several depths before changing locations.

The best fishing spot is often not the most attractive spot. It is usually a place that gives fish food, shelter, and a quick escape route. A good location may be only a few yards wide.
Learn how a lake is shaped
A lake’s shape controls how fish move. Before you choose a lure or live bait, learn the basic layout. You want to know where the bottom rises, where it falls, and where water enters or leaves.
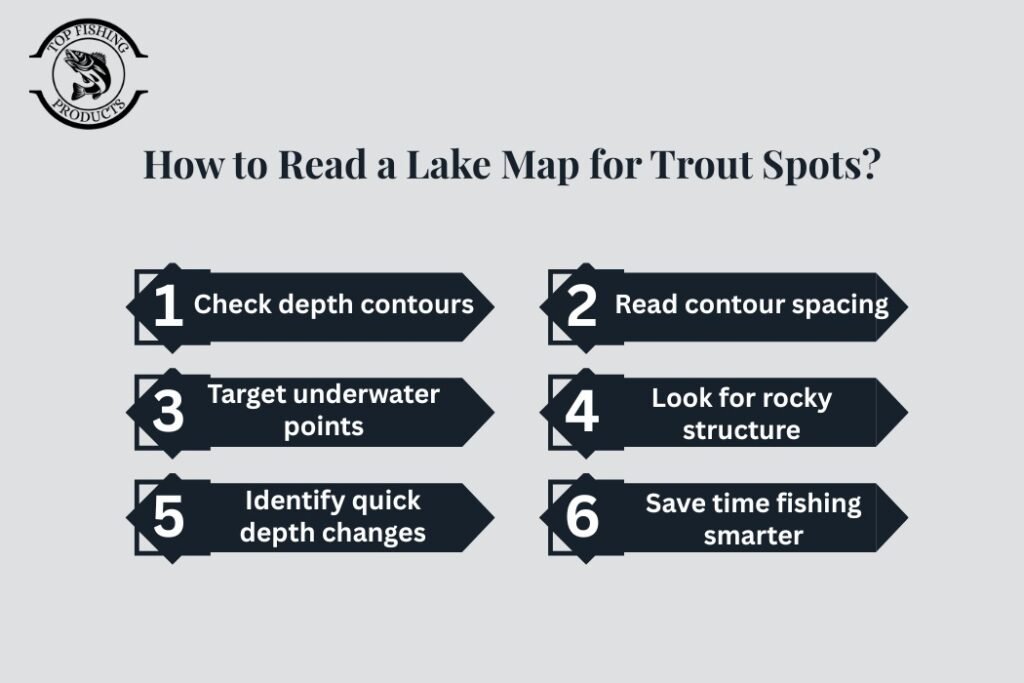
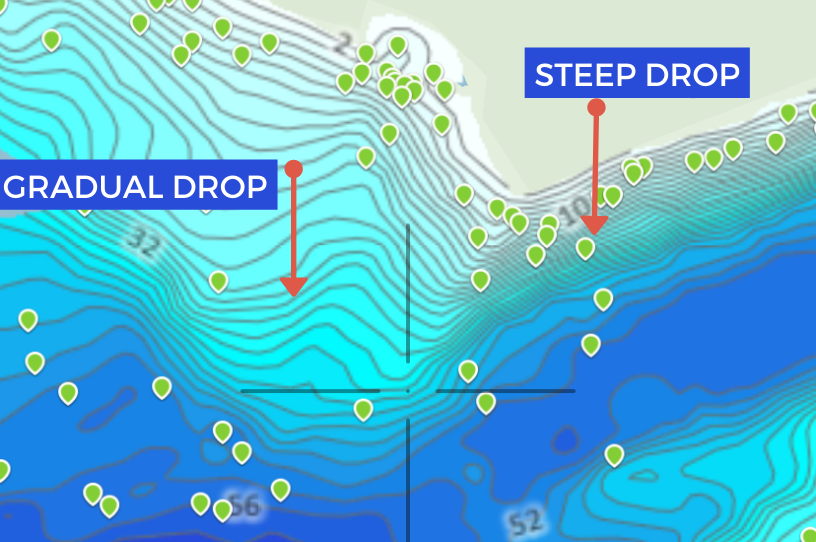
A paper map, satellite image, or digital lake map can show the broad layout. Many public lakes also have contour maps. Contour lines connect areas of equal depth. Lines close together show a steep drop. Lines spread far apart show a gradual flat.

Start with a map before you start casting
Look for these features:
- Main-lake points
- Secondary points inside bays
- Creek channels
- Inlets and outlets
- Submerged roadbeds
- Old river channels
- Flats near deep water
- Islands and humps
- Rock piles and brush
- Weed beds
- Docks and seawalls
- Dam faces and riprap
A point is land that extends into the lake. Points are useful because they often connect shallow feeding water with deeper safety water. A secondary point is smaller and often sits inside a creek arm or cove.
A hump is a shallow rise surrounded by deeper water. Humps can attract bass, walleye, and other species because they offer food and cover near a safe escape route.

Read contour lines like a fishing map
If contour lines bend around a point, fish may use the deeper side as a travel path. If the lines are tightly packed, the point drops quickly. This can be a strong place to test crankbaits, jigs, soft plastics, or live bait at several depths.
Do not fish only the visible tip of a point. Cast along both sides. Fish may hold on the windy side, the calm side, the deep edge, or the shallow top. The best section can change during the day.
| Map feature | What it tells you | First area to test |
|---|---|---|
| Tight contour lines | Steep depth change | Deep side and base of the drop |
| Wide contour lines | Gradual flat | Weed edge, rock, or feeding zone |
| Channel bend | A travel route | Inside and outside bend |
| Point into deep water | Shallow-to-deep access | Tip, sides, and drop-off |
| Hump | Isolated structure | Top, sides, and downwind edge |
Use the map to form a plan, not to make a promise. Fish may leave a classic spot when the water temperature, baitfish, light, or fishing pressure changes.
Find the edges that fish use
Fish often gather where two conditions meet. These boundaries are called edges. They are easier to find than an exact fish location, and they give you a practical starting point.
A weed edge may separate thick cover from open water. A depth edge may separate a shallow flat from a sharp drop. A color edge may separate clear water from muddy water. Each edge can concentrate food and create ambush points.

Shallow water next to deep water
A shallow flat gives fish access to food and warmth. Nearby deep water gives them shelter. This combination is valuable in every season, though the exact depth changes.
Bass may use a shallow flat early in the morning and move to the first drop as the sun rises. Walleye may feed along a gravel edge near deeper water. Crappie may suspend near brush beside a creek channel. Catfish may hold near a channel, hole, or current seam.
Start by fishing the shallow area. Then move your lure or bait along the drop. Finally, try the deeper side. This simple depth pattern prevents you from spending an hour in only one zone.
Cover next to open water
Cover includes weeds, brush, rocks, docks, fallen trees, stumps, and boat ramps. Cover gives fish shade, protection, and a place to trap prey.
The edge is often better than the center of the cover. A bass may sit just inside a weed line and rush outward. A panfish school may hold beside brush but move into open water to feed. A walleye may use a rock edge when light levels are low.
Cast parallel to the edge when possible. This keeps your lure in the strike zone longer than a short cast that crosses the edge once.

Current next to still water
Moving water brings oxygen and food. Look for creek mouths, culverts, spillways, dam releases, and narrow channels. Even a small inflow can create a useful current seam.
Fish often sit just outside the strongest flow. They face into the current and wait for food to drift toward them. Use a lighter jig, live bait rig, or soft plastic when the flow is mild. Use a heavier sinker when the current pushes your presentation away.
Never approach a spillway, dam outlet, or fast current casually. Follow posted rules and keep a safe distance.

Use water clarity, color, and light
Water clarity tells you how far fish can see. It also affects how far you need to search. Clear water often lets fish inspect a lure from a long distance. Muddy water limits sight and makes vibration, movement, and contrast more important.
You can check clarity by lowering a white lure, jig, or measuring object into the water. Note the depth at which it disappears. This gives you a rough visibility estimate. Do not treat it as a scientific reading, but use it to compare one part of the lake with another.
Match your search to visibility
| Water condition | Fish may rely more on | Useful starting presentations |
|---|---|---|
| Clear | Sight and natural movement | Small soft plastics, natural live bait, finesse jigs |
| Light stain | Sight, vibration, and flash | Spinnerbaits, crankbaits, swimbaits |
| Muddy | Vibration, sound, and silhouette | Bright jigs, rattling lures, scented bait |
| Algae stain | Contrast and movement | Dark soft plastics, chartreuse lures, slow jigs |
In clear water, use lighter line and natural colors when fish seem cautious. Monofilament can work well for beginners because it floats slightly, stretches, and costs little. Fluorocarbon is less visible underwater and sinks, but it can be stiff and harder to tie.
Braided line has little stretch and strong pulling power. It works well around weeds and heavy cover. It is also easy to see, so many anglers add a fluorocarbon leader. A leader is a short section of line tied between the main line and the hook or lure.
Read the light and shade
Low light can bring fish shallow. Dawn, dusk, cloud cover, and shade under docks may reduce the risk fish feel from predators. Bright sun can push some fish deeper or under cover.
Start shallow during low light, then check the first depth change as the sun climbs. On a sunny day, shade may be more important than depth. On a cloudy, windy day, fish may spread across a flat and feed for longer.
Polarized sunglasses cut glare from the surface. They can help you see weeds, rocks, submerged limbs, and fish in clear water. They do not replace a life jacket, map, or careful boat handling.
Let the wind help you find active water
Wind is one of the most useful lake-reading tools. It pushes surface water toward the downwind bank. That movement can gather plankton and baitfish. Predators may follow.
The downwind bank is not always the best place. Strong wind can make fishing difficult and can stir too much mud. A moderate breeze often creates a productive balance between food movement and fishable conditions.
Wind direction and lake zones
| Wind pattern | What may happen | Where to test |
|---|---|---|
| Light wind | Fish may spread or remain cautious | Cover, points, and shade |
| Moderate wind | Bait and surface food may collect | Windblown bank and point |
| Strong wind | Water may become rough or muddy | Protected side near the wind edge |
| Changing wind | Fish location may shift | New windblown areas and current seams |
Fish the bank receiving the wind first, especially if it has a point, flat, rocks, or weeds. If the bank is too shallow or muddy, move slightly deeper along the same structure.
⚠️ Safety Warning: Wind can turn a calm lake into dangerous water. Wear a properly fitted U.S. Coast Guard–approved life jacket when boating or kayak fishing. Check the forecast, watch for storms, and tell someone your plan before you leave.

Use the season to predict depth
Fish do not use the same depth all year. Water temperature, spawning needs, food, oxygen, and daylight affect their location. Seasonal patterns help you choose the first area, but they do not replace observation.
The exact timing varies by region, lake size, elevation, and species. A southern reservoir and a northern natural lake may follow different schedules. Local reports and state wildlife agencies can add useful detail.

Spring lake patterns
In spring, warming water can move fish toward shallow flats, protected coves, and areas with a firm bottom. Dark-bottom bays may warm faster than the main lake. Inflowing creeks can also bring warmer water and food.
Bass may move near spawning areas. Crappie may use brush, wood, or shallow cover. Trout may remain in cool water or near steady inflows. Do not assume every shallow fish is ready to spawn.
Use a temperature gauge if you have one. Even a small temperature difference can separate active fish from inactive fish. Fish the warmest suitable water, then check nearby depth changes.

Summer lake patterns
Summer often creates a strong separation between shallow and deep water. In some lakes, a thermocline forms. The thermocline is a zone where water temperature changes quickly with depth. It can affect oxygen and fish location.
A fish finder can help locate this layer, but you can also look for the depth where bites stop. Bass may use deep points, brush, humps, and creek channels. Walleye may feed near structure at low light. Catfish may move along deep channels and flats.
Early and late in the day, check shallow cover. During bright heat, try deeper structure, shade, or current. Carry water, sunscreen, and a hat. Heat can affect judgment long before you feel exhausted.
Fall lake patterns
In fall, cooling water can push baitfish into creek arms and coves. Predators may follow them. Windblown points, channel edges, and flats near deep water become useful starting areas.
Look for birds, surface activity, baitfish, and sudden changes in water color. A fish finder can show bait clouds, but surface signs matter too. Cast moving lures across likely routes, then slow down if fish seem scattered.
Winter and ice patterns
Cold water often slows fish, but it does not make them inactive. Fish may gather near deep basins, channel edges, steep banks, or the last remaining food source.
For ice fishing, use an ice fishing rod, a small jig, a spoon, or live bait where legal. Drill test holes across different depths and structure. Never judge ice safety by appearance alone.
⚠️ Safety Warning: Ice thickness can vary over a few feet, especially near springs, current, bridges, inlets, outlets, and vegetation. Check local ice reports, carry safety picks, wear flotation clothing when appropriate, and take a recognized ice-safety course. Never fish alone on unfamiliar ice.
Read the bottom, not just the surface
The bottom gives fish places to rest, feed, hide, and travel. You can learn about it with a fish finder, a weighted lure, or a careful feel through the rod.
A hard bottom feels sharp or solid when a sinker touches down. Mud feels soft and may let the sinker settle. Gravel often creates a light tapping feel. Wood may stop the lure suddenly or produce a dull bump.
You do not need perfect information. You only need to find a change.
Hard bottom, soft bottom, and mixed bottom
Hard bottom areas often attract crayfish, mussels, and baitfish. Gravel can be important for spawning fish. Mud may hold insect life and organic food. A mixed bottom can be especially useful because it creates a clear boundary.
Use a Carolina rig, jig, weighted soft plastic, or bottom-bouncing live bait to feel the bottom. A sinker is a small weight that helps your bait reach depth. Use only enough weight to maintain contact.
| Bottom type | Common clues | Presentations to test |
|---|---|---|
| Rock | Sharp taps and snags | Crankbaits, jigs, tubes |
| Gravel | Light ticking feel | Small jigs, jerkbaits, live bait |
| Mud | Soft landing and slow pull | Bobbers, soft plastics, bait rigs |
| Wood | Dull bumps and hang-ups | Texas-rigged plastics, jigs |
| Weeds | Pulling resistance | Weedless hooks, frogs, swimbaits |
A Texas rig places the hook point into a soft plastic so it can move through cover with fewer snags. It suits bass anglers fishing weeds or wood. A bobber keeps bait at a set depth and is easy for beginners and kids.
Use a sinker to count depth
Drop a lure or sinker beside the boat and count down. The number of seconds is not a true depth measurement unless your line, weight, and fall rate stay the same. Still, it helps you compare one location with another.
For example, if a jig reaches bottom in five seconds over one flat and ten seconds near a point, the second area is likely deeper. Repeat the test several times to avoid confusing wind or current with depth.
Use electronics without losing basic skills
A fish finder can show depth, bottom shape, cover, baitfish, and sometimes individual fish. It is a powerful tool, but it does not identify every mark correctly. Learn to read the lake first, then use electronics to refine your search.
Traditional sonar sends sound downward and reads the return. Down imaging gives a more detailed view below the boat. Side imaging scans to both sides and can reveal brush, rock, and channel edges away from your path.
What to look for on a fish finder
Look for:
- A sharp change in depth
- A flat beside a channel
- Brush or trees near a drop
- Baitfish over structure
- A clean bottom beside a rough bottom
- Suspended marks
- A creek channel bend
- A thermocline
- A change in depth along a point
Do not chase every fish-shaped mark. A mark may be debris, vegetation, air bubbles, or fish that will not bite. Use the screen to answer practical questions: How deep is it? What is below me? Where does the bottom change?
A GPS unit can help you mark productive structure, but respect private property, no-wake zones, navigation rules, and restricted areas.
Match electronics to your fishing style
| Angler and water | Useful electronics choice | Main benefit |
|---|---|---|
| Shore angler | Map app or contour map | Finds depth and access |
| Kayak angler | Compact sonar with secure mount | Shows depth and bottom |
| Boat angler | GPS fish finder | Maps structure and routes |
| Ice angler | Portable flasher or sonar | Shows depth and fish response |
| Budget beginner | Printed map and depth method | Builds observation skills |
A beginner can learn a great deal without electronics. A serious boat angler may save time with side imaging and GPS mapping. A gift buyer should ask about the recipient’s boat, battery system, mounting space, and skill level before purchasing a fish finder.
Choose tackle that helps you test the lake
Reading water is only useful if you can cover different depths and types of cover. Your tackle should let you search fast, then slow down when you find a promising area.
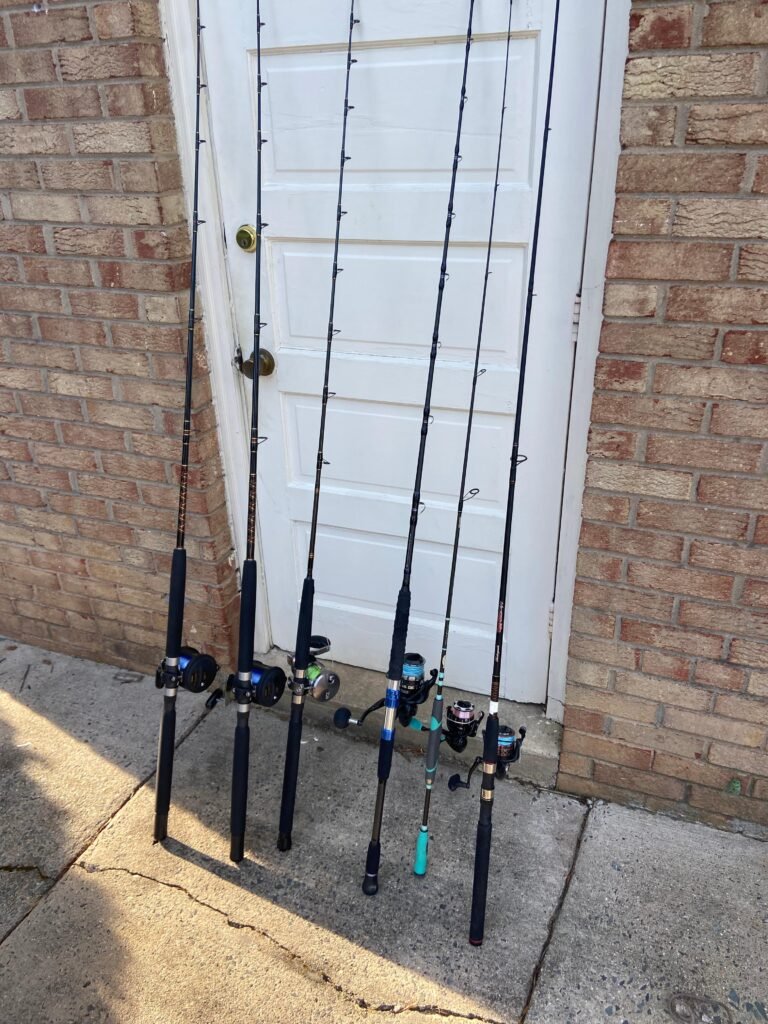
A medium-light spinning combo suits many beginners. A 6-foot-6-inch to 7-foot rod with fast action, 6- to 10-pound line, and a small spinning reel can handle panfish, trout, small bass, and light walleye work.
Rod power describes how much force a rod needs to bend. Action describes where it bends. A fast-action rod bends near the tip and feels sensitive. A moderate-action rod bends farther down and can help keep treble-hook fish pinned.
Rod and line pairings by target
| Target and method | Rod starting point | Line starting point |
|---|---|---|
| Panfish and trout | 6–7 ft light or ultralight spinning rod | 2–6 lb mono or fluorocarbon |
| Bass with soft plastics | 6’6”–7’3” medium or medium-heavy spinning rod | 8–15 lb braid with leader |
| Bass in heavy cover | 7’–7’3” medium-heavy baitcaster | 30–50 lb braid |
| Catfish | 7–8 ft medium-heavy rod | 15–30 lb mono or braid |
| Walleye jigging | 6’6”–7’3” medium-light fast rod | 6–10 lb braid with leader |
| Ice fishing | 24–36 in. light or medium-light rod | 2–8 lb line |
A baitcaster offers accurate casting and strong control, but beginners may struggle with backlash. Backlash is a line tangle caused when the spool spins faster than the lure. A spinning reel is easier to learn. A spincast combo is even simpler for young anglers, though it may offer less control and durability.
Select a lure or bait that reveals information
Use a search lure to learn the lake. A shallow crankbait can show whether fish are near cover. A spinnerbait can cover windblown water. A jig or soft plastic can reveal depth and bottom type. Live bait under a bobber can show whether fish use a certain depth.
When the water is clear, start with natural colors and smaller profiles. In stained water, try stronger vibration, brighter contrast, or a larger silhouette. Match the lure speed to fish activity, but change one factor at a time.
Experienced anglers may carry several rods for different depths. Beginners and gift buyers can start with one dependable spinning combo, a small tackle box, hooks, sinkers, swivels, bobbers, and a few lures.
Follow a step-by-step lake-reading plan
A repeatable process prevents random casting. It also helps you learn from each trip, even when fish do not cooperate.
Step 1: Check access, rules, and weather
Confirm the fishing license, open season, size limits, bag limits, bait rules, and tackle restrictions. Some waters limit lead sinkers, barbed hooks, live bait, or the number of rods.
Check wind, storms, heat, cold, and launch conditions. Shore anglers should note private property and safe bank access. Kayak anglers should review launch points, water temperature, and boat traffic.
📜 Check Local Regulations: Rules vary by state, lake, species, and season. Confirm current requirements with the state or local wildlife agency before fishing.
Step 2: Study the lake map
Mark three to five areas before you arrive. Choose one shallow flat, one point, one deep edge, one cover area, and one inflow or current area if available.
Do not plan to fish the whole lake. A focused plan helps you compare locations instead of making random moves.
Step 3: Observe the water for five minutes
Look for:
- Baitfish near the surface
- Birds diving or feeding
- Wind direction
- Floating insects
- Weed lines
- Surface shade
- Mud lines
- Current
- Jumping fish
- Fallen trees or rocks
Keep your eyes open before you make the first cast. The lake often gives clues for free.
Step 4: Start with the most active edge
Choose the windblown side of a point, a shallow flat beside deep water, or an inflow with safe access. Make several casts at different angles.
Fish the area quickly with a search lure. Change depth before changing lakeside zones. If you get a bite, repeat the cast angle and depth.
Step 5: Test three depths
Begin shallow. Then fish the first drop. Finally, try the deeper edge. Use a crankbait, spinnerbait, jig, soft plastic, live bait, or lure weight that lets you reach each zone.
Record the depth of every bite. Fish may hold at 4 feet even when the nearby water falls to 20 feet.
Step 6: Slow down after finding a clue
A bite, follow, missed strike, snag, or baitfish mark is a clue. Slow your presentation and make more precise casts.
Try a smaller lure, lighter line, slower retrieve, or a different angle. If a fish follows but does not strike, change speed or pause length before abandoning the area.
Step 7: Log what you learn
Write down:
- Date and time
- Weather and wind
- Water clarity
- Surface temperature
- Depth of bites
- Lure or bait
- Bottom type
- Structure
- Fish species
- Release or harvest details
A simple fishing log becomes a personal lake map. After a season, patterns often become clearer than any single trip.
Avoid the most common lake-reading mistakes
Many anglers fish hard but learn little because they change too many things at once. A better approach is to make a small change, observe the result, and keep useful notes.
Mistake 1: Fishing only visible cover
A fallen tree is easy to see, but fish may sit on the drop beside it. Fish the cover, the outside edge, and the nearest depth change.
Mistake 2: Staying in one depth
If you fish only the shoreline, you may miss fish suspended over deep water or holding on the first drop. Test at least three depth zones.
Mistake 3: Following old advice without checking conditions
A spot that worked last week may change after rain, wind, temperature shifts, or heavy fishing pressure. Treat past success as a clue, not a rule.
Mistake 4: Moving too often after one cast
One empty cast proves little. Make several casts from different angles. Then change depth, speed, or location in a planned way.
Mistake 5: Using too much tackle
A large tackle box can create confusion. Carry a small group of lures that cover shallow, medium, and deep water. Add terminal tackle as needed.
| Problem | Likely cause | Better response |
|---|---|---|
| No bites near cover | Fish are deeper or outside the cover | Fish the edge and nearby drop |
| Lure stays above fish | Too light or too fast | Add weight or slow down |
| Many snags | Lure does not suit cover | Use weedless hooks or a different angle |
| Fish follow but do not strike | Speed, size, or color is wrong | Pause, downsize, or change color |
| Water is too muddy | Fish rely less on sight | Use vibration and stronger contrast |
| Wind makes casting hard | Unsafe or poor angle | Move to a protected side |
The best solution depends on species, season, water type, and tackle. Do not blame the lure before checking depth and location.
Adjust the approach for different fish
Each species uses lake structure in its own way. Species behavior overlaps, but your first search should match the target.
Bass
For bass fishing, look for points, weeds, wood, docks, rocks, creek channels, and shade. Bass often use cover as an ambush point. Search with crankbaits, spinnerbaits, swimbaits, or topwater lures, then slow down with jigs and soft plastics.
A medium-heavy rod suits heavy cover. A medium spinning rod is easier for open water and light presentations. Watch for seasonal movement rather than assuming all bass sit shallow.
Trout
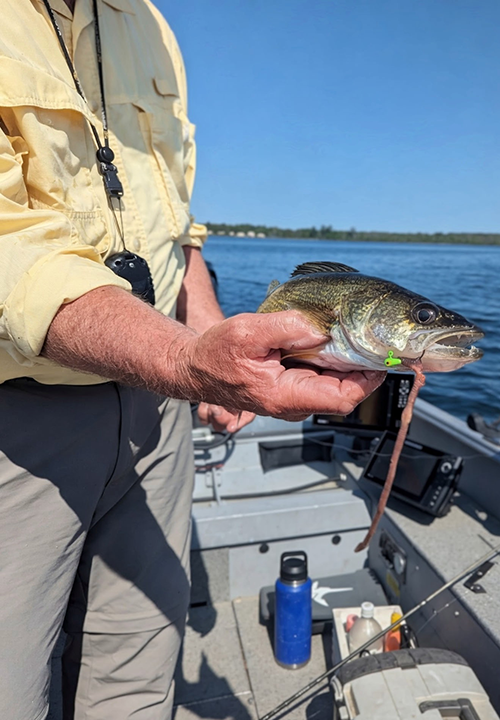
Trout usually need cool, oxygen-rich water. Look near springs, inflows, shaded banks, deep layers, and areas with insect activity. In stocked lakes, trout may travel in open water and suspend at a stable depth.
Use a light spinning rod, small spoons, spinners, jigs, or legal live bait. Fly anglers should watch insect size, surface feeding, and wind. A fly rod is useful when fish feed near the surface, but a spinning setup can cover more situations for beginners.
Walleye
Walleye often use depth changes, rock, gravel, points, humps, and low-light periods. Wind can make a rocky point productive. Dawn, dusk, clouds, and deeper water may reduce light and improve feeding conditions.
Try jigs with soft plastics, live bait rigs, crankbaits, or bottom-bouncing methods where legal. Use a medium-light fast-action rod for jig control and sensitivity.
Catfish
Catfish often relate to channels, holes, flats near deep water, current, and areas where food collects. After rain, inflows may carry food into the lake. Strong current and unstable water can also make fishing unsafe.
Use sturdy rods, circle hooks where required or preferred, and fresh legal bait. Keep a landing net, pliers, and a way to safely handle larger fish.
Panfish
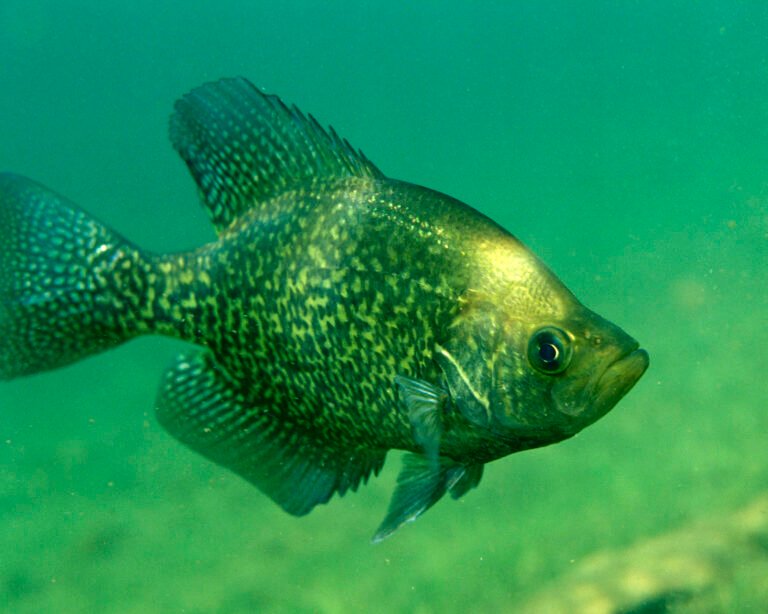
Bluegill, crappie, perch, and other panfish often use weeds, brush, docks, shade, and suspended cover. A bobber makes depth changes simple. Small jigs, worms, minnows, and tiny lures work well when legal.
This is often the best starting point for kids. A short spincast combo, simple bobber rig, and light tackle make the process easy to see and understand.
👪 Parent or Gift-Buyer Note: For a child, prioritize a comfortable 5- to 6-foot rod, a simple spincast reel, a low-cost tackle box, barbless practice hooks, and close adult supervision. Avoid handing a child a sharp hook or knife without direct guidance.
Fish safely from shore, a boat, kayak, or ice
Lake reading should never come before safety. A perfect fishing location is not worth a fall, collision, storm exposure, or cold-water emergency.
Shore anglers should avoid unstable banks, steep edges, slippery rocks, and private property. Wear shoes with grip and carry pliers for hook removal. Keep a first-aid kit and phone in a waterproof case.
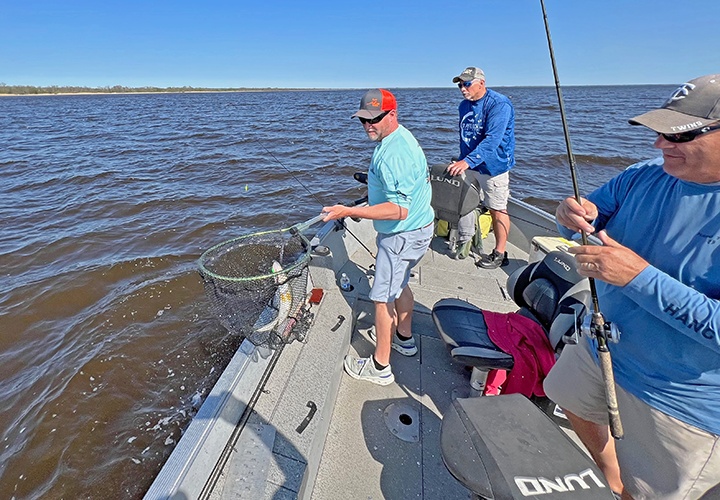
Boat and kayak anglers need a properly fitted U.S. Coast Guard–approved PFD. Secure rods, tackle boxes, landing nets, and coolers so they do not become hazards. Check the vessel’s weight capacity, especially when carrying extra gear.
Waders can fill with water if you fall. Use a wading belt, move slowly, and avoid deep or fast water unless trained. Never wade alone in unfamiliar conditions.
Essential safety gear
| Situation | Useful safety gear | Key habit |
|---|---|---|
| Shore fishing | Pliers, first-aid kit, grippy shoes | Check the bank before stepping |
| Boat fishing | PFD, whistle, navigation lights | Wear the PFD and check weather |
| Kayak fishing | PFD, paddle leash, dry bag | Stay within the kayak’s capacity |
| Wading | Wading belt, staff, felt or rubber soles | Test depth and current |
| Ice fishing | Ice picks, flotation gear, rope | Test ice and avoid current |
| Hot weather | Water, hat, sunscreen | Take shade and rest breaks |
Tell someone where you plan to fish and when you expect to return. A simple message can save valuable time during an emergency.
Practice conservation while you learn
Lake reading works best when healthy fish and habitat remain. Handle fish with wet hands. Keep them out of the air only as long as needed. Use a landing net when it reduces stress and prevents a fish from hitting the ground.
Barbless hooks make release easier. Circle hooks can reduce deep hooking when used correctly with bait, but rules differ by species and water. Do not cut line and leave it trailing from a fish.
Keep only the legal number and size of fish. Release unwanted fish quickly and follow local harvest rules. Dispose of old monofilament and braid in a line-recycling container or trash bin.
🌿 Conservation Note: Never move live fish, bait, plants, or water from one lake to another. Invasive species can spread through boats, live wells, anchors, waders, and tackle. Clean, drain, and dry your gear after each trip.
Decide whether a fish finder is worth the money
A fish finder is worth considering when you fish large lakes, deeper water, unfamiliar reservoirs, or a boat that can support the unit. It can save time by showing depth and structure that you cannot see from the surface.
It may not be the right first purchase for a shore angler, casual panfish angler, or beginner still learning basic casting. A good map, polarized sunglasses, a simple depth method, and a fishing log can teach core skills at much lower cost.
Current pricing ranges from affordable portable units to advanced GPS, side-imaging, and mapping systems. Check the latest listing for updated features, battery needs, screen size, transducer type, and mounting parts.
Match spending to the angler
| Budget level | Useful tools | Best suited to |
|---|---|---|
| Low | Map, sunglasses, simple spinning combo | Beginners and shore anglers |
| Moderate | Better reel, tackle box, landing net, GPS app | Regular lake anglers |
| Higher | Fish finder, mapping, multiple rods | Boat anglers and structure hunters |
Do not buy advanced electronics for someone who has no way to mount, power, or use them. For a gift, ask whether the angler fishes from shore, a kayak, or a boat. The right answer can change the purchase completely.
Maintain gear after every lake trip
Gear care keeps your lake-reading tools reliable. Rinse dirt from reels, dry wet tackle, and remove hooks from soft plastics before storage. Store rods where guides will not bend and keep line away from heat and sunlight.
Freshwater gear still needs care. Sand, mud, sunscreen, and plant material can damage reels and drag systems. Saltwater anglers must be even more careful because salt can corrode stainless parts, aluminum frames, hooks, and electrical connections.
Simple post-trip checklist
| Gear | Care task | How often |
|---|---|---|
| Spinning or baitcasting reel | Wipe, dry, and check drag | Every trip |
| Rod and guides | Remove grit and inspect for cracks | Every trip |
| Line | Check for nicks and abrasion | Before each trip |
| Hooks and lures | Dry before storage | Every trip |
| PFD | Check straps, buckles, and damage | Before use |
| Kayak or boat | Clean, drain, and inspect | Every trip |
Replace line when it has deep nicks, severe curl, fading, or repeated breakage. Check hooks when points feel dull or rust appears. A small sharpening tool can help, but badly corroded hooks should be replaced.
Know when to ask a local tackle shop or guide
A local tackle shop can explain lake-specific details that maps cannot. Ask where fish are being caught, what depth is working, whether live bait is legal, and what access points are safe.
Do not ask only, “Where are the fish?” Ask better questions:
- What depth should I start with?
- Is the lake clear or stained?
- Which side has the wind?
- Are fish on flats, drops, or cover?
- What line test works here?
- Are there local bait or hook rules?
- Is this area safe for a kayak or child?
- What species are closed or protected?
A licensed guide can shorten the learning curve, especially on a large reservoir, unfamiliar river-fed lake, or technical fishery. A boating-safety or ice-safety course is also a wise investment when conditions are new.
Frequently asked questions
Q: What is the first thing to look for when reading a lake?
A: Start with structure and depth. Find a point, flat, creek channel, weed line, or drop-off. Then identify which areas offer nearby deep water, cover, and food. These features give you a logical place to begin before you choose a lure.
Q: How do I read a lake without a fish finder?
A: Use a contour map, watch the wind, study water color, look for visible cover, and test depth with a weighted lure. Count the time it takes for the lure to reach bottom. Compare that count across points, flats, and drop-offs.
Q: Where should I fish on a lake from shore?
A: Look for public access near a point, creek mouth, inflow, weed edge, dock, bridge, or drop-off. Cast along the edge instead of only toward open water. Check local rules and respect private property.
Q: Is the windy side of a lake always better?
A: No. A moderate wind can push bait and food toward a bank, but strong wind may make the water unsafe or too muddy. Fish the windblown side when it has useful structure, then move to a protected nearby edge if conditions become difficult.
Q: What depth should I fish first?
A: Start shallow during low light, spring warming, or visible bait activity. Try the first drop when the sun is bright or shallow water looks empty. Test at least three depth zones instead of assuming one depth will work all day.
Q: How can I tell if a lake has a thermocline?
A: A fish finder may show a thin, continuous line below the surface. Without electronics, you can compare water temperature and watch where bites stop as you fish deeper. Local lake reports may also mention the thermocline.
Q: What is the best rod for reading a lake?
A: For most beginners, a 6-foot-6-inch to 7-foot medium spinning rod with fast action is a flexible choice. It can cast light lures, soft plastics, bobbers, and small live bait. Heavy-cover bass anglers may prefer a medium-heavy baitcasting setup.
Q: Should I use monofilament, fluorocarbon, or braid?
A: Use monofilament for low cost, easy knots, and beginner-friendly stretch. Use fluorocarbon when low visibility and sinking line help. Use braid for strength, long casts, and heavy cover, often with a fluorocarbon leader.
Q: Are fish finders accurate?
A: Fish finders can show useful depth and structure, but screen marks need interpretation. Debris, weeds, bubbles, and fish may look similar. Use electronics with a map, lure contact, and visual clues.
Q: How do I read a lake for bass fishing?
A: Find cover near depth changes. Check points, creek channels, weed edges, docks, wood, rocks, and shade. Use a moving lure to search, then slow down with a jig or soft plastic when you find a bite or follow.
Q: How do I read a lake for trout?
A: Look for cool, oxygen-rich water, springs, inflows, shade, insect activity, and stable depth. Trout may suspend in open water. Small spinners, spoons, jigs, flies, and legal bait can help you test different layers.
Q: What should kids learn first?
A: Teach kids to identify shallow water, deep water, cover, wind, and safe casting space. A simple bobber rig with a spincast combo makes depth and bites easy to see. Supervise every hook, lure, knife, and shoreline step.
Q: How long does fishing line last?
A: Line life depends on use, sunlight, heat, abrasion, and storage. Inspect it before every trip. Replace line when you see nicks, severe memory, fading, weak knots, or unexplained breaks.
Q: Do I need a fishing license to fish a lake?
A: In most U.S. states, anglers need a valid fishing license unless they qualify for an exemption. Rules may also cover size limits, bag limits, seasons, bait, hooks, and lead. Check the current state or local wildlife agency rules.
Q: What is the biggest mistake when learning to read a lake?
A: The biggest mistake is fishing one spot, one depth, and one lure for too long. Use a plan. Change depth, angle, speed, or structure in a measured way, and record what the lake teaches you.
Final advice: treat the lake like a puzzle
The best way to read a lake for fishing is to combine a map, observation, depth changes, weather, seasonal clues, and careful testing. Look for edges first. Then ask why fish might use that area. Does it offer food, cover, shade, current, or a fast route to safety?
You will not decode every lake in one trip. That is normal. Each cast adds a small piece to the picture. A beginner can start with a map and spinning combo. An experienced angler can add sonar, GPS marks, and detailed logs. A parent or gift buyer can keep the setup simple, safe, and easy to use.
Learn the water before you blame the lure. Fish a few likely areas well. Stay alert to changing conditions, follow local regulations, and care for the lake and the fish that live in it. Over time, the shoreline stops looking empty. It starts to show you a pattern.