How To Pick A Good Fishing Spot: Best Tips
Choosing a good fishing spot starts with reading the water, not with buying more tackle. Fish need food, cover, oxygen, and a safe path through the water. Your job is to find places where those needs meet while staying within the law and keeping yourself safe.
A great fishing spot may be a public bank, a rocky point, a weed edge, a creek mouth, a bridge, a pier, or a small change in depth. The best choice depends on the fish you want, the season, the water type, your skill level, and how far you can travel. A beginner with a simple spinning reel can find productive water close to home. An experienced angler may use a fish finder, tide chart, map, or kayak to reach the same type of structure offshore.

The quick answer: look for food, cover, depth, and moving water
The best way to pick a fishing spot is to find areas where fish can feed while using less energy. Start with structure such as weeds, rocks, fallen trees, drop-offs, creek mouths, points, docks, and current seams. Match the spot to your target species, time of year, and bait. Check access, weather, water safety, and local rules before fishing. Then test the area with a few careful casts.

A good fishing spot often has at least two of these features:
- Food, such as insects, minnows, crawfish, shad, or worms
- Cover, such as weeds, logs, rocks, docks, or brush
- A depth change
- Current or moving water
- Shade or cooler water
- A safe place for you to stand, launch, or cast
Do not assume the busiest bank or the spot with the most people is always best. Anglers may gather at an easy access point, but fish may hold 30 yards away at a current edge or a drop-off. Watch, listen, and make a plan before you cast.
Start with the fish you want to catch
The target species should guide nearly every choice. Bass, trout, catfish, panfish, walleye, redfish, and surf species use different habitats. A spot that is good for bluegill may be poor for trout, while a shallow bass flat may not hold catfish during the day.

Before leaving home, answer three simple questions:
- What species are available in this water?
- What food does that species eat?
- Where can that food and fish find cover?
A fishing report can help, but treat it as one clue rather than a promise. Water levels, weather, fishing pressure, and bait movement can change a spot within hours. Local tackle shops often know which public areas are open and what bait or lure type matches current conditions.
Bass fishing spots
Bass often use cover and depth changes. Look for weed lines, boat docks, laydowns, rock banks, submerged points, creek channels, and the edges of spawning flats. In warm weather, shade and deeper water become more important. In spring, bass may move toward shallow areas near creek channels and hard bottoms.

For shore fishing, focus on places where you can reach several depths with one cast. A point, bridge, or bank that drops quickly is often more useful than a long, flat shoreline. Try soft plastics, jigs, crankbaits, or live bait when legal.
A beginner can fish for bass with a 6-foot-6 to 7-foot medium-power spinning rod, a 2500- to 3000-size spinning reel, and 8- to 12-pound monofilament or braided line with a leader. A baitcaster offers more control for experienced anglers but takes practice to prevent backlash, which is a tangled spool caused by the reel turning faster than the lure.
Trout fishing spots
Trout need cool, clean water with enough oxygen. In streams, look for riffles, pools, undercut banks, boulders, logjams, and the head or tail of a pool. A riffle is a shallow, fast section that adds oxygen and carries insects. A pool is deeper, slower water where trout can rest.

The seam where fast and slow water meet is a high-value place. Food moves along this line, and trout can hold in slower water while watching the current. Cast upstream and let your bait or lure move naturally with the flow.
For lake trout, focus on depth, temperature, and baitfish. A fish finder can show depth changes and suspended fish, but shore anglers should search near points, creek inlets, rocky banks, and areas where cold water enters the lake.
Catfish and panfish spots
Catfish often use deep holes, outside bends, creek channels, submerged trees, riprap, and areas with food washed into the water. After rain, a muddy feeder creek may carry worms, insects, and other food into a lake or river. Current breaks below dams and near bridge pilings can also hold catfish, where legal and safe to access.

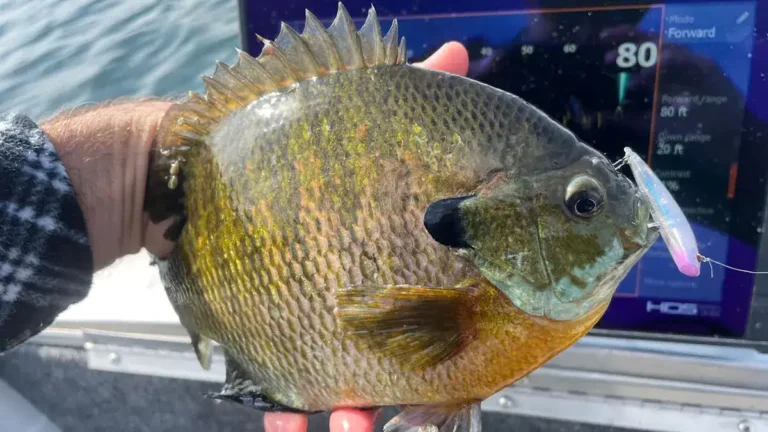
Panfish, including bluegill, crappie, and perch, often stay near weeds, brush, docks, fallen trees, and submerged grass. They may move shallow during low-light periods and spawn in warm, protected areas. A bobber, small hook, light line, and live bait make a simple setup for beginners and kids.
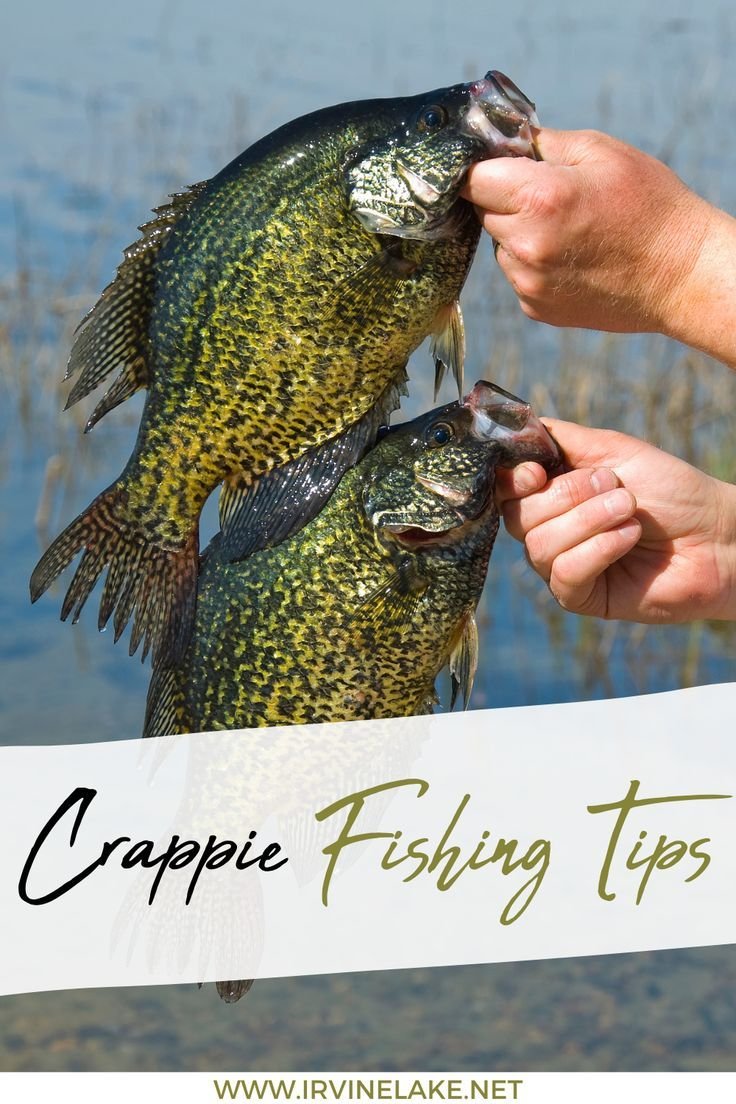
For crappie, search around brush piles, standing timber, bridge supports, and submerged cover. Crappie may suspend above cover rather than sit directly on the bottom, so vary your depth.
Walleye, redfish, and saltwater targets
Walleye often relate to rocky points, humps, drop-offs, current, and areas where baitfish gather. Low-light periods can be useful because walleye have light-sensitive eyes. In rivers, focus on current seams, eddies, islands, and the downstream side of structure.

Redfish and other inshore saltwater fish may use grass edges, oyster beds, marsh drains, creek mouths, flats, passes, and deeper channels. Moving water can push shrimp, crabs, and small fish into feeding lanes. Read tide charts, but also watch the actual water. A strong tide may make a shallow flat unsafe or too fast to fish well.
Surf anglers should look for cuts, troughs, sandbars, jetties, inlets, and areas where waves break differently. A cut through a sandbar can act like a highway for bait and predators. Always check local beach rules and surf conditions before entering the water.
Learn to read a lake, river, stream, or coast
Water type changes how you find fish. A river gives you current and seams. A lake gives you depth, structure, and broad flats. The ocean adds tides, wind, waves, and strong currents. Start by identifying the main features of the water before choosing a cast.
The table below shows common clues and what they may mean. These clues are not guarantees, but they help you build a smart first plan.
| Water clue | Why it may attract fish | What to try |
|---|---|---|
| Creek mouth | Brings food and fresh oxygen | Cast the seam and nearby depth change |
| Weed edge | Offers cover and holds insects or baitfish | Fish parallel to the edge |
| Rocky point | Creates a depth change and current break | Fan-cast several angles |
| Fallen tree | Gives fish shade and cover | Cast past the cover and work along it |
| Bridge piling | Breaks current and creates shade | Fish the upstream and downstream sides |
| Muddy inflow | May carry food after rain | Use natural bait or a vibration lure |
Lakes and reservoirs
On a lake, look for points, creek arms, flats, humps, channels, submerged roads, dams, riprap, and standing timber. A paper map, satellite map, or electronic lake map can reveal features that you cannot see from shore. Many reservoirs have steep banks near old creek channels, which can give fish fast access to shallow and deep water.
Do not ignore a feature because it looks small. A tiny point, isolated stump, or single rock may stand out in an otherwise smooth bottom. Such spots can concentrate fish, especially when wind pushes bait toward them.
Wind can improve a bank by moving plankton and baitfish. A wind-blown shoreline may look rough, but it can hold more food than a calm bank. New anglers should choose a wind direction they can safely fish without losing control of their boat, kayak, or cast.
Rivers and streams
In moving water, fish often face into the current and wait for food to pass. Search behind rocks, logs, bridge supports, islands, bends, and changes in bottom depth. The best place may be just outside the strongest flow, where fish can rest and still reach drifting food.
A river bend has an outside bank and an inside bank. The outside bank often has deeper water because current removes soil. The inside bank may have a shallow gravel bar where fish feed at certain flows. Current speed changes with rain, dam releases, and tides, so check water conditions before wading.
Small streams reward quiet movement. Walk slowly, keep a low profile, and avoid casting a large shadow across the water. Fish in clear water may notice footsteps, bright clothing, or heavy line.
Ponds and small public waters
Small ponds can be excellent for beginners because they are easy to understand. Look for shade, weed beds, inflowing ditches, drains, brush, docks, and areas where the bottom changes. In warm weather, fish may move toward deeper water or shaded cover during the day.
Ask permission before fishing private ponds. Do not cross fences or use a private dock without approval. Public access rules may also limit bait, boats, swimming areas, and shoreline access.
Coastal water, piers, and surf
Saltwater fishing spots change with tide, wind, wave direction, and bait movement. Inshore anglers should study marsh drains, grass edges, oyster bars, channels, and passes. Pier anglers can fish the pilings, current edges, shaded areas, and the end of the pier, but crowded spaces require extra care with hooks and casts.
Surf anglers need a long cast only when fish are outside the first trough. Many fish move close to shore, especially during low light, rough water, or a strong feeding tide. Read the beach before setting up. A rip current, marked swimming zone, or steep shore break is not a safe fishing position.
⚠️ Safety Warning: Wear a properly fitted U.S. Coast Guard–approved personal flotation device when boating, kayaking, or fishing near deep or rough water. Check weather, tide, waves, and water temperature. Tell someone where you plan to fish and when you expect to return.
Use maps and tools before you travel
The best way to save time is to study a spot before you arrive. Satellite images, public access maps, contour maps, tide charts, weather reports, and fishing forums can show useful details. These tools help you find possible spots, but they cannot replace an on-site look.
Use maps to check:
- Public roads and legal access
- Parking and walking distance
- Boat ramps and kayak launches
- Water depth and bottom contours
- Nearby creeks and drainage areas
- Docks, bridges, points, and islands
- No-fishing zones and private property
- Wind direction and sun exposure
A fish finder can show depth, bottom hardness, vegetation, and fish-shaped marks. It does not identify every mark correctly, and it cannot make an unsafe place safe. Learn the basic settings before relying on it.
How to read satellite images
Look for color changes, points, creek mouths, weed lines, rocks, sandbars, and old channels. Compare images from different seasons if available. Low water may reveal structure that becomes hidden when the lake rises.
Satellite images can be out of date. A new dock, closed road, private gate, or changed shoreline may not appear. Use them to form a plan, then confirm conditions when you arrive.
How to use contour maps
Contour lines show changes in depth. Lines close together usually indicate a steep drop. Lines spread far apart show a more gradual slope. Points that extend into deep water, underwater humps, and creek channels are valuable areas to investigate.
A beginner does not need an expensive mapping system. A free public map, printed chart, or local lake map can show enough detail to choose a starting area. Experienced anglers may combine mapping data with GPS waypoints and sonar.
How weather changes a spot
Weather affects light, temperature, wind, pressure, and water movement. A cold front may slow some fish, while wind may push bait toward a bank. Heavy rain can raise a river quickly and make wading dangerous.
Cloud cover may let fish use shallow water longer. Bright sun often pushes fish toward shade, deeper water, vegetation, or boat docks. These patterns vary by species and water body, so use them as a starting point rather than a rule.
Check access, parking, and fishing pressure
A productive spot must be legal and practical. A famous location is not useful if you cannot reach it safely, park without blocking others, or cast without putting people at risk. Access is part of choosing a fishing spot.
Before you go, confirm:
- The shoreline or launch is public
- You have permission for private land
- Parking is allowed
- The area is open during your planned hours
- You can leave without crossing dangerous terrain
- The bank can support your weight
- You have room to cast
- The area is not reserved for swimming or boating traffic
The table below compares common fishing access points. Each has clear strengths and limits.
| Access point | Best use | Main limitation |
|---|---|---|
| Public bank | Simple shore fishing and low cost | Limited casting range and crowded areas |
| Pier | Access to deeper water | Tight space and extra hook safety concerns |
| Boat ramp | Launching a boat or kayak | Busy traffic and limited fishing room |
| Wading area | Reaching current seams and flats | Slippery bottoms and changing water levels |
| Private pond | Quiet fishing with permission | Requires landowner approval |
| Surf beach | Broad access and moving water | Waves, wind, tides, and long walks |
A spot with fewer people may be better for a quiet cast, but an empty area can also signal poor access or unsafe conditions. Look for worn paths, litter, posted signs, and local warnings. Never remove a gate, cut a lock, or cross a closed area.
Fishing pressure and crowd behavior
Fishing pressure means how often people fish a location. Heavy pressure can make fish cautious, but it does not always ruin a spot. A popular area may still produce because it has the best structure or access.
If a bank is crowded, move to the edge rather than squeezing between anglers. Change your angle, depth, bait, or timing. Early morning, late evening, weekdays, and poor-weather windows may offer more space, but only fish when conditions remain safe.
Choosing spots for kids
For children, the best fishing spot is safe, simple, and close to home. Choose a stable bank with shade, restrooms nearby, low traffic, and room for short casts. A place with panfish can keep a young angler engaged while they learn knot tying, baiting, and fish care.
Avoid steep banks, slippery rocks, strong current, exposed hooks, and areas near fast boat traffic. Bring water, sun protection, insect repellent, a first-aid kit, and a pair of pliers. A short trip with one or two hours of focused fishing is often better than an all-day outing.
👪 Parent or Gift-Buyer Note: A simple spincast combo, small tackle box, size 6 to 10 hooks, bobbers, split shot, and live bait suit many young beginners. Choose a location where the child can watch the bobber without needing to cast far.
Match your gear to the spot
The right spot can still feel difficult if your tackle does not match the water. A compact spinning combo suits many shore anglers. A baitcaster may help with heavier bass lures but requires more skill. A fly rod works best when you have room for a back cast or enough space for roll casting.
Rod power describes how much force a rod needs to bend. Light and medium-light rods suit panfish and trout. Medium rods handle general bass, walleye, and catfish work. Medium-heavy and heavy rods suit larger fish, thick cover, strong current, or heavy lures.
Rod action describes where the rod bends. Fast action bends near the tip and gives a quick feel. Moderate action bends farther down the blank and can help keep treble-hook fish pinned. A graphite rod is light and sensitive, while fiberglass and composite rods are often more forgiving.
| Fishing situation | Useful starting setup | Why it fits |
|---|---|---|
| Panfish from shore | 5- to 6-foot light spinning rod, 4- to 6-pound line | Easy casting and good bite feel |
| General bass fishing | 6-foot-6 to 7-foot medium spinning rod, 8- to 12-pound line | Versatile for lures and bait |
| Bass in heavy cover | 7-foot medium-heavy baitcaster, 30- to 50-pound braid | More power around weeds and wood |
| Trout stream | 7- to 8-foot light spinning rod, 4- to 6-pound line | Good control in small water |
| Catfish from bank | 7- to 9-foot medium-heavy rod, 15- to 30-pound line | Casting distance and lifting power |
| Surf fishing | 9- to 12-foot surf rod, line matched to sinker and species | Helps cast beyond nearshore waves |
| Ice fishing | 24- to 36-inch light or medium-light ice rod | Fits a small hole and close-range work |
Line test means the approximate weight a line is designed to handle under stated conditions. Monofilament is low cost and stretches. Fluorocarbon is less visible underwater and resists abrasion, but it can be stiff. Braided line has little stretch and high strength for its diameter, but it may need a fluorocarbon or monofilament leader.
A leader is a short section between the main line and hook or lure. Leaders can reduce visibility, add abrasion resistance, or help with toothy fish. Match hook size, sinker weight, bobber size, and lure depth to the fish and current.
When a spinning reel is the best choice
Spinning reels are usually the easiest option for beginners, kids, and anglers who fish many types of water. They cast light lures well and do not create the same spool-control problem as a baitcaster. A 2500- or 3000-size reel covers many freshwater trips.
For small trout and panfish, a 1000- or 2000-size reel may be enough. For larger bass, catfish, or light inshore fishing, a 3000- or 4000-size model may offer more line capacity. Check the current product page for exact drag and line-capacity figures.
When to use a baitcaster
Baitcasters suit experienced anglers who need accurate casts, heavy lures, or strong control around cover. The main difference between a baitcaster and spinning reel is that the baitcaster spool rotates during the cast. You must control spool speed with your thumb and braking system.
A baitcaster is not the best first reel for every child or beginner. It can be a good gift for an angler who already fishes and wants to learn a new technique. Practice with a heavier practice plug in an open area before fishing near trees or docks.
When a telescopic or fly rod makes sense
Telescopic rods pack small and suit travel, hiking, and emergency tackle kits. Their joints need clean handling because sand, dirt, and forced closure can damage them. They are convenient, but many low-cost models have less crisp action than a one-piece or two-piece rod.
Fly rods work well for trout, bass, panfish, and some saltwater species when the angler can manage the cast and line. A 3- to 5-weight fly rod often suits small trout and panfish, while heavier weights handle bass, larger trout, or inshore fish. Match the fly rod to the target and available casting space.
Test a new spot with a simple plan
A good fishing spot deserves a methodical test. Do not arrive, make three casts, and leave unless conditions are unsafe. Fish often hold at a narrow depth or small piece of cover.
Use this step-by-step approach:
- Stand back and observe. Look for baitfish, birds, insects, surface activity, current seams, shade, weeds, and changes in water color.
- Check the wind and current. Decide whether you can cast and land a fish safely.
- Start with a visible lure or bait. A bobber, small jig, soft plastic, or natural bait helps you learn depth.
- Fan-cast the area. Cast left, center, and right to cover different angles.
- Change depth before moving far. Fish may be above or below your first presentation.
- Work the structure carefully. Cast beside a log, weed edge, dock, or rock instead of always casting directly into it.
- Change speed and size. Try a slower retrieve, smaller lure, or lighter sinker.
- Move if the area gives no clues. Fish another depth, angle, or nearby feature.
Start with high-percentage water. That means a place where several useful features meet, such as a weed edge beside a drop-off or a creek mouth near a point. One feature may hold fish, but two or three features create a stronger reason to test the area.
Watch before you cast
Surface signs include baitfish flicking, insects landing on the water, birds diving, fish breaking, and current pushing foam or debris. These signs show activity, but they do not always reveal the exact species or depth.
Use polarized sunglasses to cut glare and see shallow structure. They can help you spot weeds, rocks, drop-offs, and fish movement. They do not replace a life jacket, safe footing, or a careful look at changing weather.
Fish the whole water column
The water column is the full depth from the surface to the bottom. Fish may feed on top, suspend in the middle, or rest near the bottom. A bobber can test the upper levels, while a jig, sinker, crankbait, or soft plastic can probe deeper water.
Change one variable at a time when possible. If you change lure, depth, location, and retrieve at once, you will not know what helped. Keep simple notes about water level, weather, depth, bait, and results.
Know which fishing spots are worth the cost
Many anglers ask whether a fish finder, kayak, boat, guide, or premium tackle is worth the money. The answer depends on the water you fish and how often you go. You do not need expensive gear to learn how to pick a good fishing spot.
Current pricing ranges from low-cost public access trips to costly boat, fuel, and electronics packages. A budget angler may gain more from a map, license, good shoes, and a reliable knot than from a large sonar unit. An experienced angler who fishes deep lakes often may get more value from mapping and sonar.
| Budget level | Useful investment | Best for |
|---|---|---|
| Low cost | License, map, polarized glasses, simple spinning combo | Beginners, kids, and local shore anglers |
| Moderate | Better rod, landing net, tackle box, waders, or small sonar | Regular freshwater anglers |
| Higher | Kayak, fish finder, GPS mapping, quality safety gear | Anglers who fish often and travel on water |
| Guide trip | Local knowledge and instruction | Visitors, gift buyers, and anglers learning new water |
A guide can shorten the learning curve, especially on large lakes, rivers, and saltwater. Ask what the trip includes, what gear is supplied, whether licenses are covered, and what species and water conditions are realistic.
Is a fish finder worth it?
A fish finder can be useful when you fish from a boat, kayak, or ice shelter. It may show depth, bottom shape, vegetation, and suspended targets. It is less useful for a bank angler who cannot move far or fish beyond casting range.
A basic unit may be enough for depth and bottom readings. Side imaging, mapping, and GPS add value for anglers who explore large waters. Learn how to read the display instead of treating every mark as a fish.
Are waders worth it?
Waders can expand access in rivers, streams, flats, and surf zones. They also increase risk if water enters and pulls you down. Use a wading belt, move slowly, and avoid water above your skill level.
Never wade fast water alone. Wear the right footwear for the bottom, check water levels, and use a staff in uneven areas. In cold water, choose insulating layers and know the signs of hypothermia.
Avoid common mistakes when choosing a spot
Most poor fishing trips begin with a weak plan, not bad luck. Anglers often choose a place because it looks attractive, then ignore depth, access, weather, or legal limits.
| Common mistake | Better solution |
|---|---|
| Fishing only the prettiest bank | Look for structure, food, depth, and access |
| Staying in one place all day | Move after testing several depths and angles |
| Ignoring wind | Fish wind-blown areas when safe and manageable |
| Casting into heavy cover without a plan | Use suitable line, hooks, and a landing path |
| Trusting old online reports | Confirm current water and access conditions |
| Using gear that is too light | Match rod power, line, and drag to the fish |
| Crowding another angler | Give space and ask before sharing a narrow area |
| Fishing private land without permission | Confirm public access or contact the owner |
The pros and cons below can help you compare common approaches. No single method works for every angler or water type.
| Approach | Pros | Cons |
|---|---|---|
| Shore fishing | Low cost, simple setup, easy for beginners | Limited range and access |
| Kayak fishing | Reaches quiet water and covers more area | Needs safety skill, storage, and transport |
| Wading | Reaches current seams and shallow flats | Slippery footing and changing water risk |
| Fishing from a pier | Gives access to deeper water | Crowds and hook hazards |
| Fishing with a guide | Builds local knowledge quickly | Costs more and depends on conditions |
| Using a fish finder | Shows depth and structure | Adds cost and needs practice |
A common beginner error is changing lures too fast. Location and depth often matter more than lure color. Try to learn where fish are before collecting a large tackle box.
Another mistake is using a stringer in warm water or with fish that must be released. A landing net, wet hands, and quick handling are safer for catch and release. Check whether stringers are legal and suitable for the species.
Follow licenses, access rules, and conservation practices
A legal fishing spot is one where you have permission, a valid fishing license when required, and gear that follows local rules. Regulations can cover species, size limits, bag limits, closed seasons, bait, hooks, lead sinkers, and fishing hours.
📜 Check Local Regulations: Confirm current rules with your state wildlife agency, provincial or local authority, park office, or fishery manager before fishing. Regulations can change by water body, and an old social media post may be wrong.
Carry proof of your license when required. Read posted signs at ramps, piers, beaches, and parks. Some waters ban live bait, barbed hooks, treble hooks, or certain lead tackle.
Practice careful catch and release
Wet your hands before touching a fish. Use barbless hooks when allowed, or flatten barbs to make removal easier. Circle hooks can reduce deep hooking when used with suitable bait and species, but follow local rules and learn how to let the hook set properly.
Keep fish in the water when possible. Limit air exposure, support the body, and avoid squeezing the gills. Use pliers for hooks and cut the line near a deeply embedded hook if removal would cause more harm.
🌿 Conservation Note: Pick up loose monofilament and braided line. Discard fishing line in a recycling bin or approved collection box. Line can injure birds, turtles, fish, and other wildlife.
Protect the water and shoreline
Do not leave bait containers, worm bedding, hooks, or soft-plastic packaging behind. Never release aquarium fish, unused bait, or invasive plants into a new water body. Clean, drain, and dry boats, kayaks, nets, and waders before moving between waters.
Respect other anglers and local residents. Keep music low, park legally, and leave gates as you found them. Good behavior protects access for everyone.
Pick a spot by season and time of day
Season changes fish location because water temperature, food, light, and spawning behavior change. A good fishing spot in spring may be poor in the heat of summer. Time of day also affects shade, surface activity, and fishing pressure.
| Season or time | Areas to check first | Useful clue |
|---|---|---|
| Early spring | Creek mouths, shallow flats, sunny banks | Warming water and new food |
| Late spring | Spawning areas, coves, gravel, weeds | Fish move shallow in many waters |
| Summer morning | Shallow cover, weed edges, shade | Cooler light and active bait |
| Summer midday | Deep water, docks, current, shade | Fish avoid heat or bright light |
| Fall | Points, creek arms, baitfish routes | Fish may follow moving bait |
| Winter | Deep holes, slow pools, sunny banks | Stable temperature matters |
| Dawn or dusk | Flats, weed edges, shorelines | Lower light and feeding activity |
These are broad patterns, not guarantees. Species, latitude, water clarity, and weather can change the result. Use temperature and bait movement as clues, then adjust after observing the water.
Ice fishing locations
Ice anglers should search for depth changes, weed edges, points, basin areas, and places where fish feed during winter. A contour map can help you choose safe access points and likely depth zones before drilling holes.
Ice thickness is never uniform. Check it as you move, avoid areas with current, springs, inlets, outlets, pressure cracks, slush, or recent thaw, and carry safety picks. Fish with a partner and tell someone your exact plan. A professional ice-safety course is a wise choice for new anglers.
How to choose the first spot on a new lake or river
When you reach unfamiliar water, do not try to fish the entire shoreline. Choose one area with several useful features, then build a short pattern.
Use this process:
- Find the nearest legal access point.
- Mark one shallow feature and one deep feature.
- Look for current, wind, shade, weeds, rocks, or wood.
- Watch for baitfish and bird activity.
- Start with a search lure or simple bait.
- Fish three depths and several casting angles.
- Record what you learn.
- Move to a similar feature nearby.
If you catch one fish, ask why it may be there. Was it near a drop-off, a weed edge, a current seam, a shadow, or bait? Search for that same feature elsewhere. This turns one catch into a repeatable pattern without assuming every spot will produce.
How long should you fish one spot?
Give a new spot enough time to test depth and presentation. Ten to 20 focused minutes may be enough for active fish, but slower conditions can require longer. Move sooner if the water looks wrong, access becomes unsafe, or you cannot reach the likely holding area.
Do not measure success only by fish caught. A spot can teach you water depth, bottom type, bait movement, and safe access. Those lessons improve your next trip.
When to ask a local tackle shop or guide
Local knowledge can save time and prevent mistakes. A good tackle shop can explain public access, current water levels, bait rules, line choices, hook sizes, and basic lure selection. Ask specific questions instead of asking only, “Where are they biting?”
Useful questions include:
- Which public areas are open and safe?
- Is the water high, low, clear, or muddy?
- What depth should I try first?
- Are there bait or hook restrictions?
- Which species are common in this area?
- Is the bank suitable for kids or beginners?
- What should I avoid after rain or strong wind?
- Do I need waders, a net, or a longer rod?
Guides can help with unfamiliar lakes, rivers, surf zones, and kayak fishing. Choose a licensed or properly permitted guide where required. Ask about safety equipment, cancellation rules, fish handling, licenses, and the skill level expected.
Frequently asked questions
Q: What makes a fishing spot good?
A: A good fishing spot combines food, cover, depth, oxygen, or current. It must also be legal and safe to reach. Look for places such as weed edges near drop-offs, creek mouths, current seams, rocks, docks, fallen trees, and points.
Q: How do I find a good fishing spot near me?
A: Start with public access maps, satellite images, state fishing reports, lake contour maps, and a local tackle shop. Confirm parking, open hours, access rights, and current regulations before you go.
Q: Is shore fishing better in the morning or evening?
A: Morning and evening often offer lower light, cooler water, and less fishing pressure. However, wind, season, species, and water conditions matter more than a fixed time rule. Fish safe hours with good visibility and weather.
Q: Where should a beginner fish?
A: Choose a public pond, calm lake bank, managed pier, or small stream with stable footing and easy access. Panfish are often a good learning target. Use a simple spinning or spincast combo, small hooks, a bobber, and legal bait.
Q: What is the best fishing spot for kids?
A: The best spot for kids has safe footing, shade, room to cast, nearby facilities, and a good chance to see panfish. Avoid steep banks, strong current, busy boat lanes, and exposed rocks. Stay close and use pliers for hooks.
Q: How can I find fish without a fish finder?
A: Read visible structure, water movement, depth changes, shade, weeds, baitfish, insects, birds, and surface activity. Fan-cast several angles and test different depths. A map and polarized sunglasses can reveal much of what you need.
Q: Should I fish deep water or shallow water?
A: Try both. Shallow water often attracts fish during low light, feeding periods, warming trends, and spawning seasons. Deep water can offer stable temperatures, shade, and safety during bright or hot conditions.
Q: Are points good fishing spots?
A: Points can be good because they extend into deeper water and may create current or wind breaks. Fish the shallow tip, deep side, and nearby drop-off. The best point depends on season, species, bait, and water level.
Q: What rod is best for finding fish from shore?
A: A 6-foot-6 to 7-foot medium spinning rod is a useful general choice for bass, walleye, small catfish, and many freshwater lures. Use a light rod for panfish and trout, or a longer surf rod for beaches. Match line and lure weight to the target.
Q: Is braided line good for fishing around cover?
A: Braided line offers high strength and low stretch, so it can help around weeds and wood. It may be visible in clear water, so many anglers add a fluorocarbon leader. Check knots often and match line strength to the fish and cover.
Q: Do I need a kayak to reach good fishing spots?
A: No. Shorelines, piers, bridges, and public banks can be excellent. A kayak adds access to quiet water but also requires transport, balance, weather judgment, and safety equipment. Wear a U.S. Coast Guard–approved PFD every time.
Q: How do I know if a river spot is safe to wade?
A: Check water level, current speed, weather, temperature, bottom type, and exit routes. Avoid rising water, deep channels, dams, strong eddies, and areas without a safe way back. Never wade unfamiliar fast water alone.
Q: How long should a fishing spot take to produce?
A: There is no fixed time. Test several angles and depths for 10 to 20 focused minutes, then move if the area lacks useful signs. Slow conditions may require more patience, while unsafe conditions require leaving at once.
Q: Can I fish anywhere that looks public?
A: No. Confirm property ownership, public access, posted restrictions, parking rules, and fishing regulations. A shoreline may be visible from a road but still be private. Ask permission rather than assume.
Q: What should I bring to test a new spot?
A: Bring a license, water, weather-appropriate clothing, polarized sunglasses, pliers, a landing net, spare hooks and line, simple lures or bait, a small tackle box, sun protection, and a first-aid kit. Add a PFD, wading belt, or ice safety gear when needed.
Final advice for finding better fishing water
The best fishing spot is not always the farthest, deepest, or most famous place. It is the legal and safe area where your target fish can find food, cover, depth, and comfortable water. Learn to see points, seams, weed edges, creek mouths, docks, rocks, and drop-offs as parts of a fish habitat.
Start close to home. Use a map. Watch the water. Match your rod, line, hooks, sinkers, bobbers, lures, and leaders to the place you chose. Test a spot with a simple plan, record what you learn, and move when the evidence tells you to move.
With time, water begins to look less like a blank surface and more like a living map. That skill is worth more than any single lure, and it helps beginners, experienced anglers, and families enjoy safer, smarter fishing trips.