How to Restring a Fishing Rod – Beginner Guide in 10 Minutes
Restringing a fishing rod is a simple skill every angler should master. This guide walks you through the entire process step by step. You will learn how to restring a fishing rod in about 10 minutes, even if you have never done it before.
Every angler eventually faces the same question. When should I put a new line on my rod? The answer is more often than most people think. Old line gets brittle, weak, and tangled. It ruins your casting and costs you fish. The good news is that learning how to restring a fishing rod takes only about 10 minutes once you know the basics.
Before we dive into the step-by-step process, let us look at why fresh line matters and what supplies you will need.
Key Takeaways
- Restringing is essential: an old or damaged line reduces casting distance and increases the chance of losing a fish.
- Choose the right line: Monofilament, fluorocarbon, and braided lines each have unique strengths for different fishing styles.
- Tools matter: A line spooler tool or a friend to hold the spool makes the job much easier and prevents tangles.
- Step-by-step process: Remove the old line, thread the new line through the guides, attach it to the spool, and wind it evenly with proper tension.
- Common mistakes to avoid: Overfilling the spool, using twisted line, or winding too loosely will cause frustrating tangles.
- Maintenance extends line life: Rinse your line after saltwater trips and store rods properly to keep your fresh string in top shape.
- Practice builds confidence: After doing it once or twice, you will be able to restring your rod quickly at home or on the water.
📑 Table of Contents
- Why You Should Restring Your Fishing Rod Regularly
- Choosing the Right Fishing Line for Your Rod
- Tools and Supplies You Need to Restring a Fishing Rod
- Step by Step Guide: How to Restring a Fishing Rod in 10 Minutes
- Common Mistakes When Restringing a Fishing Rod
- Pro Tips for a Perfect Fishing Rod Restring
- How Often Should You Restring Your Fishing Rod?
- Storing Your Fishing Rod After Restringing
- Conclusion
Why You Should Restring Your Fishing Rod Regularly
Fishing line does not last forever. Even the best fishing line degrades over time. Sunlight, heat, water, and friction from the rod guides all take their toll. The line that sits on a reel for months develops memory coils. These coils cause your line to twist and tangle during casts.
Here are the main signs that it is time to restring your rod.
- Visible damage: Look for nicks, frays, or discoloration along the line.
- Frequent tangles: If your line keeps twisting or forming loops, it has lost its strength.
- Reduced casting distance: A weak or old line does not flow smoothly through the guides.
- After heavy use: A long day of fighting big fish can stress the line and weaken it.
- Time-based replacement: Monofilament should be replaced every 6 to 12 months with regular use.
Pro Tip: If you fish saltwater, rinse your rod and reel with fresh water after every trip. Salt accelerates line deterioration and damages the reel spool.
Choosing the Right Fishing Line for Your Rod
Visual guide about fishing rod restringing
Image source: easytripguides.com
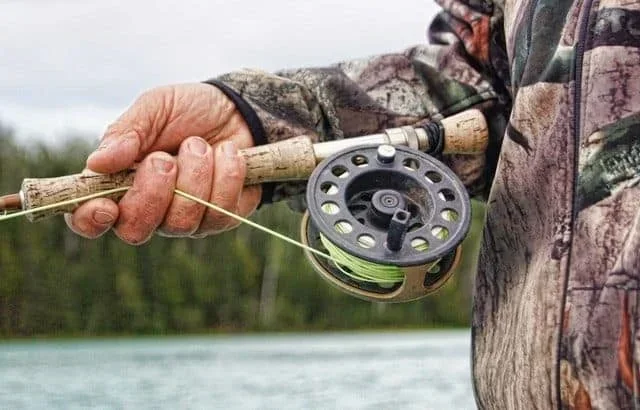
Before you restring, you need to pick the right type of line. The three most common types are monofilament, fluorocarbon, and braided fishing line. Each works well in different fishing situations.
Monofilament Line
Monofilament is the most popular choice for beginners. It stretches under pressure, which helps absorb the shock of a hard-fighting fish. It floats on the water surface, making it great for topwater lures. Monofilament is also the most affordable option.
- Best for: Beginners, topwater lures, and general freshwater fishing
- Diameter: Thicker than fluorocarbon for the same pound test
- Memory: Higher memory means it coils more easily over time
Fluorocarbon Line
Fluorocarbon is nearly invisible underwater. Fish cannot see it easily, which makes it perfect for clear water conditions. It sinks faster than monofilament and has very little stretch. This gives you better sensitivity to detect light bites.
- Best for: Clear water, finesse fishing, and leader material
- Diameter: Thinner than monofilament at the same strength
- Memory: Moderate memory, but less than monofilament
Braided Fishing Line
Braided line has the highest strength-to-diameter ratio. It is incredibly strong, has zero stretch, and lasts longer than both mono and fluoro. However, it is more visible underwater and costs more. Many anglers use braid as their main line with a fluorocarbon leader tied to the end.
- Best for: Heavy cover, long casting, and saltwater fishing
- Diameter: Much thinner than mono or fluoro at the same test
- Memory: Almost no memory at all
Quick Comparison Table
| Feature | Monofilament | Fluorocarbon | Braided |
|---|---|---|---|
| Stretch | High | Low | None |
| Visibility | Moderate | Low | High |
| Durability | Moderate | Good | Excellent |
| Best Water Type | All-purpose | Clear water | Heavy cover / Saltwater |
| Price | Low | Moderate | Higher |
Tools and Supplies You Need to Restring a Fishing Rod
Visual guide about fishing rod restringing
Image source: i.ytimg.com
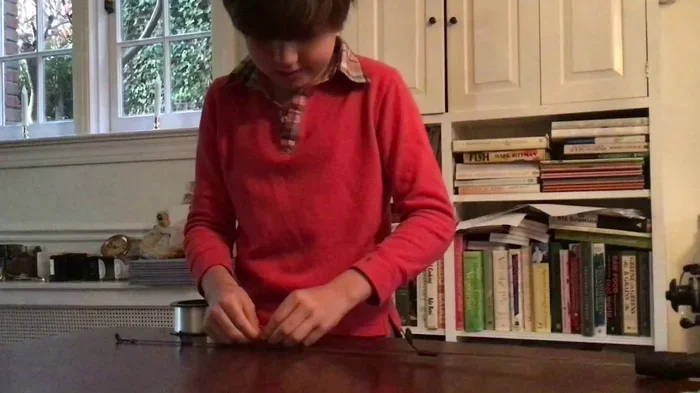
Having the right tools makes the restringing process much smoother. You do not need a lot of equipment, but a few items are essential.
- New fishing line: Choose the type and pound test that matches your reel and fishing style
- Scissors or line clippers: A sharp pair of clippers gives you clean cuts every time
- A rag or towel: Keeps your hands and reel clean during the process
- Line spooler tool (optional): This tool holds the line spool and lets you wind evenly with consistent tension
- A helper (optional): A friend can hold the line spool while you reel, keeping tension steady
If you do not have a spooler tool, you can place the line spool on a pencil or dowel. Feed the line off the spool while your friend holds the pencil. This simple setup works surprisingly well.
Quick Tip: Before starting, pull about 6 feet of line off the new spool. This gives you plenty of line to thread through all the rod guides and tie your knot.
Step-by-Step Guide: How to Restring a Fishing Rod in 10 Minutes
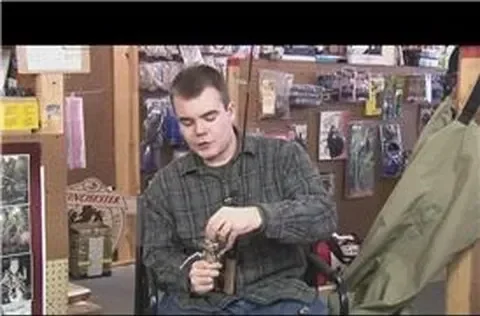
Visual guide about fishing rod restringing
Image source: img.wonderhowto.com
Now we get to the main event. Follow these steps carefully, and you will have a freshly strung rod in no time. If you are just getting started with fishing gear, you might also find our fishing guide for beginners helpful for building a strong foundation.
Step 1: Remove the Old Fishing Line
Start by cutting the old line from your reel. Use your line clippers to snip the line just above the reel spool. Then open the bail on your spinning reel or disengage the spool on a baitcaster. Slowly pull the old line off the reel and through each rod guide.
You can simply discard the old line or wind it into a recycling bin if your local tackle shop accepts old fishing line. Many shops have fishing line recycling programs that turn old line into new products.
Step 2: Thread the New Line Through the Rod Guides
Take your new spool of fishing line and pull the tag end through the first rod guide closest to the reel. This is the largest guide, often called the stripper guide. Continue threading the line through each guide, working your way up to the tip top.
Make sure the line sits properly in each guide ring. If the line slips out of a guide while you wind, it creates uneven tension and can cause tangles later.
Common Mistake: Skipping a guide is easier than you think, especially on rods with many guides. Double-check that the line passes through every single one.
Step 3: Attach the New Line to the Reel Spool
Now you need to tie the line to the reel spool. The most common and reliable method is the arbor knot. Here is how you tie it.
- Wrap the tag end of the line around the reel spool.
- Tie a simple overhand knot around the main line.
- Tie a second overhand knot on the tag end.
- Pull tight and trim the excess tag end.
- Moisten the knot with a little water or saliva before pulling it tight. This reduces friction and prevents the line from weakening.
Close the bail on a spinning reel or engage the line guide on a baitcaster. Make sure the knot is snug against the spool.
Step 4: Wind the Line onto the Reel with Proper Tension
This is the most important step. Proper tension ensures the line lies flat and even on the spool. Loose line causes tangles and bird nests. An overly tight line can damage the line or the reel.
Hold the line between your thumb and forefinger as you reel. Apply gentle, steady pressure. The line should feel firm but not stretched. Reel slowly and steadily.
Here are a few tips for getting the best results.
- Fill the spool to the right level: Leave about 1/8 inch of space from the top of the spool lip. Overfilling causes the line to jump off and tangle.
- Keep the line coming off the spool in the same direction: For spinning reels, the line should come off the spool in the same direction the bail rotates.
- Let line come off the face of the spool: For baitcasters, the line should peel off the front of the spool as you reel.
- Apply even pressure: Do not speed up or slow down. Consistent tension gives you a smooth, even wrap.
Step 5: Check Your Work and Test the Line
Once you have wound all the new line onto the reel, pull out about 10 to 15 feet and let it lay on the ground. Look for twists or loops. If the line lays flat and smooth, you did a great job.
Open and close the bail a few times to make sure the line flows freely. Test the drag by pulling line off the reel. It should come out smoothly with steady resistance.
If everything looks good, you are ready to tie on your favorite fishing lure or rig and hit the water.
Common Mistakes When Restringing a Fishing Rod
Even experienced anglers make mistakes when restringing. Here are the most common ones and how to avoid them.
Overfilling the Spool
This is the number one mistake beginners make. Too much line on the spool causes it to jump off during casts. Always leave that small gap of about 1/8 inch from the spool lip.
Winding Line Too Loosely
Loose line digs into itself on the spool. When you cast, the top layers fall off and create a massive tangle. Keep steady tension throughout the winding process.
Using the Wrong Line Type for Your Reel
Braided line on a spinning reel without a backing can slip on the spool. Always add a layer of monofilament backing before spooling braid. This gives the braid something to grip onto.
Ignoring Line Twist
If your line keeps twisting after restringing, the line may have been wound on in the wrong direction. Remove the line and reverse the spool. Wind it on again with the line coming off the correct side.
Not Checking Rod Guides
Cracked or damaged rod guides fray your line from the start. Before restringing, inspect each guide for cracks or rough spots. If you find damage, have the guide replaced before putting on new line.
Pro Tips for a Perfect Fishing Rod Restring
Want to take your restringing skills to the next level? Here are some expert tips that make the process faster and easier.
Soak Monofilament Before Winding
If you use monofilament line, soak the spool in warm water for 10 to 15 minutes before winding. This reduces memory coils and helps the line lay flatter on the spool. It is a simple trick that makes a noticeable difference.
Use a Line Spooler Tool
A dedicated line spooling tool is one of the best investments you can make. It holds the spool at the right height and applies consistent tension as you wind. Many models cost less than twenty dollars and save a lot of frustration.
Match Line Weight to Your Reel
Every reel has a recommended line weight range. Check the specifications printed on the reel spool or in the manual. Using line that is too heavy or too light affects casting performance and can damage the reel.
Add a Leader for Extra Stealth
If you use braided line, tie on a 2 to 3 foot fluorocarbon leader. The leader is nearly invisible underwater and helps you land more fish in clear water. Use a double uni knot or albright knot to connect the two lines.
Restring Before Every Trip
Do not wait until your line fails. Make it a habit to restring your rod before important fishing trips. Fresh line gives you confidence and reduces the chance of losing a trophy fish because of old equipment.
How Often Should You Restring Your Fishing Rod?
The answer depends on how often you fish and what type of line you use. Here is a general guideline.
- Monofilament: Replace every 6 to 12 months with regular use, or sooner if you see damage
- Fluorocarbon: Replace once a year with regular use, since it degrades slower than mono
- Braided line: Lasts 2 to 3 years or more with proper care
- Saltwater fishing: Inspect line after every trip and replace at the first sign of wear
If you fish multiple times per week, check your line frequently. Run your fingers along the line and feel for rough spots or nicks. Any damage means it is time for a fresh spool.
For more detailed tips on setting up and maintaining your gear, check out our article on fishing pole rod tips that covers everything from rod care to casting techniques.
Storing Your Fishing Rod After Restringing
Proper storage keeps your new line in good shape longer. Here are a few simple practices that help.
- Store rods vertically or horizontally: Avoid leaning rods in corners where they can bend or warp
- Keep them out of direct sunlight: UV rays break down fishing line over time
- Loosen the drag: This relieves pressure on the line and prevents it from developing permanent curls
- Use rod socks or tubes: They protect the guides and line from dust and scratches
If you are preparing for a saltwater adventure, our saltwater fishing tips article has great advice on protecting your gear in harsh marine conditions.
Conclusion
Learning how to restring a fishing rod is one of the most practical skills any angler can develop. It saves you money, saves you time at the tackle shop, and keeps your gear performing at its best. With the right line, a few basic tools, and the step by step process outlined in this guide, you can complete the job in about 10 minutes.
Remember to choose the right line type for your fishing style, apply even tension when winding, and always check your work before heading out. Avoid the common mistakes like overfilling the spool or winding too loosely. And do not forget to restring regularly so you never lose a great fish because of worn out equipment.
Now grab your favorite rod, pick up some fresh line, and give it a try. The next time your line looks tired or damaged, you will know exactly what to do. Tight lines and happy fishing.
Frequently Asked Questions
What is the best knot for tying fishing line to a reel spool?
The arbor knot is the most popular and reliable choice. It is simple to tie and holds securely on the spool. Moisten the knot before pulling tight to prevent friction damage to the line.
Can I use braided line directly on a spinning reel spool?
You can, but it is better to add a monofilament backing first. Braid is slippery and may spin on the spool under pressure. The backing gives the braid something to grip and prevents slippage.
How much line should I put on my fishing reel?
Fill the spool until the line sits about 1/8 inch below the spool lip. Overfilling causes tangles, while underfilling reduces casting distance. Check your reel’s specifications for the recommended line capacity.
How do I prevent line twist when restringing my rod?
Make sure the line comes off the spool in the correct direction as you wind it on. For spinning reels, the line should peel off the front of the spool. Keeping steady tension also helps prevent twist.
Is it worth buying a line spooler tool?
Yes, a line spooler tool is a great investment for any angler. It applies consistent tension and makes the restringing process much faster and easier. Most models are affordable and work with all reel types.
How long does fishing line last before it needs replacing?
Monofilament should be replaced every 6 to 12 months. Fluorocarbon lasts about a year. Braided line can last 2 to 3 years or more. Saltwater use and frequent fishing shorten the lifespan of all line types.