How To Find The Best Fishing Spot: Expert Tips
Finding the best fishing spot is less about luck and more about reading water, matching conditions to fish behavior, and choosing a place you can fish safely and legally. A great spot may be a quiet creek bend, a rocky point on a lake, a weed edge, a river drop-off, a public pier, or a deep hole below a bridge. The key is learning what attracts fish and how to confirm those clues before you cast.
The best location also depends on your target species, gear, skill level, travel range, and season. A beginner with a spincast combo may need a calm public shoreline. A bass angler may look for cover and a depth change. A trout angler may focus on cold, clean current. A surf angler needs beach structure, tides, and safe casting space. This guide explains how to find productive fishing spots in freshwater and saltwater while protecting fish, people, and habitat.

Quick Answer: How to Find a Good Fishing Spot
The best way to find a fishing spot is to identify the target species, study maps and recent reports, then look for food, cover, current, depth changes, and safe access. Start with legal public water near home. Check weather, water temperature, tides, boat traffic, parking, and local rules. Fish the area carefully, record what you learn, and return during better conditions.

Start With the Fish You Want to Catch
Different fish prefer different water. Before searching for a location, choose one or two target species. Your answer will guide every other decision, including depth, bait, time of day, line test, and access.
Bass often hold near weeds, docks, fallen trees, rocks, boat ramps, and drop-offs. Trout usually need cool, oxygen-rich water. Catfish may use deep holes, current seams, creek mouths, and soft bottom areas. Panfish often gather near weeds, brush, docks, and shallow cover.
Saltwater fish also follow food and structure. Redfish may patrol grass flats, oyster edges, creek mouths, and shallow bays. Surf fish often gather near cuts, sandbars, troughs, jetties, and areas where waves break differently. The exact species and local habitat still matter, so use regional fisheries information instead of relying on one rule.

Match the Spot to the Target Species
The table below gives a starting point. It does not replace local knowledge or current conditions.
| Target fish | Productive features | Useful starting presentation |
|---|---|---|
| Largemouth bass | Weed lines, docks, wood, rocks, drop-offs | Soft plastics, jigs, crankbaits |
| Trout | Cold current, riffles, pools, undercut banks | Small spinners, flies, live bait where legal |
| Catfish | Deep holes, creek mouths, current breaks | Cut bait, live bait, bottom rigs |
| Panfish | Weed beds, brush, docks, shallow cover | Small jigs, worms, bobbers |
| Walleye | Points, rocky humps, current, low light | Jigs, minnows, crankbaits |
| Redfish | Grass flats, oyster edges, tidal creeks | Soft plastics, spoons, live bait |
Use the species clues as a filter. If you want bass, a wide, featureless bank may be less useful than a nearby point with weeds and a depth change. If you want panfish with children, a calm dock with legal access may be a better choice than a remote bank.

Decide How Far You Can Travel
The best fishing spot is one you can reach often. A nearby lake that you visit twice a month may teach you more than a famous destination that takes six hours to reach.
Think about parking, walking distance, boat ramps, launch fees, road quality, and restroom access. Parents and beginners should also consider shade, cell service, flat ground, and a place to handle hooks safely. Experienced anglers may accept a longer hike if the water receives less pressure.
Travel limits also affect gear. A shore angler may favor a 6- to 7-foot spinning rod and a compact tackle box. A kayak angler needs a PFD, paddle, anchor system, landing net, and gear that stays secure. An angler flying to a destination may need a telescopic rod or a travel rod that fits airline rules.
Use Maps, Reports, and Local Knowledge
Online tools help you narrow the search before you leave home. Start with state wildlife agency maps, public access lists, lake contour maps, satellite images, tide charts, and local fishing reports. These sources can show depth, ramps, shoreline access, habitat projects, and seasonal closures.
Google Maps and satellite views can reveal points, creek mouths, bridges, riprap, submerged channels, and areas where a small stream enters a lake. These clues are useful, but satellite images may be old. Water levels change. A visible bank may be private land, and a road may not provide legal access.
Local tackle shops can add details that maps miss. Ask what species are active, which public areas allow fishing, what bait is legal, and whether recent rain, heat, or wind changed the bite. Do not ask only, “Where are they biting?” Ask, “What type of structure and depth should I look for this week?”

Check Public Access Before You Go
Public water does not always mean public access. A lake may be public, but the shoreline may cross private property. A river may be navigable by boat while nearby land remains private. Read posted signs and confirm access with the landowner, park office, marina, or state wildlife agency.
Look for boat ramps, fishing piers, public beaches, parks, wildlife areas, and designated bank-fishing sites. Some locations allow fishing only during certain hours. Others require a parking pass, launch fee, or special permit.
Never cross a fence, block a driveway, or park on a private road without permission. Respecting access rules protects the future of fishing for everyone.

Read Fishing Reports With Care
Fishing reports can show patterns, not guarantees. A report that mentions bass near shallow grass may describe one short window during warm weather. A report about trout in a river may depend on water flow, insect activity, and recent stocking.
Look for repeated details:
- Water temperature
- Water level and clarity
- Wind direction
- Tide stage
- Bait or forage present
- Depth where fish were seen
- Structure that held fish
- Lure, bait, or fly type
- Time of day
Reports from several days ago may still help if weather stayed stable. After a cold front, heavy rain, strong wind, or sudden water release, treat old reports as background only.

Learn to Read the Water
Fish often gather where food, shelter, oxygen, and comfortable temperature meet. You do not need expensive electronics to find these areas. Careful observation from shore can reveal a great deal.
Look for current seams, where fast water meets slow water. Watch for eddies, foam lines, submerged rocks, weed edges, points, creek mouths, and changes in bottom color. Birds, baitfish, insects, and surface activity can also reveal feeding areas.
Depth changes are especially important. A flat bank may drop into deep water near a point, channel, bridge, or old creek bed. Fish can move between shallow feeding areas and deeper safety without traveling far.

Find Structure and Cover
Structure is the shape or feature of the bottom. Cover is an object that gives fish shade, shelter, or an ambush point. Examples include points, humps, ledges, weed beds, docks, brush, laydowns, rocks, pilings, and bridge supports.
Bass may sit beside a log or under a dock. Trout may hold behind a rock that breaks current. Catfish may rest in a deep hole below a riffle. Redfish may search an oyster edge as the tide moves bait.
Fish the edge first. The outside line of a weed bed often gives fish both cover and a clear path to open water. Cast along the edge before casting deep into the cover.

Look for Current and Moving Water
Current brings food and oxygen. It also forces baitfish and insects into predictable paths. Good places include creek mouths, points, bridge pilings, bends, riffles, waterfalls, culverts, and the downstream side of rocks.
The most useful area may not be the fastest water. Fish often hold in a calm pocket beside moving water. Cast into the current and let your bait drift toward the seam when the technique allows it.
Use extra care near strong current. Water can look calm on the surface while flowing hard below. Wear a properly fitted life jacket when fishing from a boat, kayak, or unstable bank. Do not wade into water that you cannot safely cross.

Notice Wind, Sun, and Shade
Wind can push plankton and baitfish toward a bank. That may draw larger fish close to shore. A windblown point, cove, or shoreline can be productive, especially when the wind is steady and moderate.
Shade can also matter. Docks, trees, bridges, and steep banks block sunlight and may give fish cooler water or better ambush cover. Early and late in the day, shallow areas may be worth trying. During bright midday conditions, fish may move deeper or tighter to cover.
Wind direction is not always a benefit. Strong wind can make casting difficult, create unsafe waves, and reduce visibility. Choose a sheltered bank if you are teaching a child or using a small boat.

Compare Fishing Spots Before You Choose One
A strong fishing location must offer more than fish habitat. It should also be legal, reachable, safe, and suitable for your gear. Use the table below to compare common types of fishing spots.
| Location type | Strengths | Limits |
|---|---|---|
| Public lake bank | Easy access and simple freshwater setup | Can face heavy pressure and limited casting space |
| River bend | Current, depth changes, and varied habitat | High water and slippery banks can be dangerous |
| Fishing pier | Stable platform and access to deeper water | Crowds, snags, and limited room |
| Boat ramp area | Easy launch and often deeper water nearby | Boat traffic and restricted fishing zones |
| Small farm pond | Simple access and good learning water | Private access and limited fish diversity |
| Surf beach | Large area and access to moving water | Tides, waves, wind, and long casting needs |
| Kayak access | Reaches quiet water and shallow habitat | Requires PFD, weather planning, and secure gear |
Start with the location that fits your skill and safety level. A good spot for an experienced kayaker may be a poor choice for a young child. A deep pier may offer better fish access, but a small public pond may create a better first fishing trip.

Use the Right Gear for the Spot
The right gear helps you fish efficiently and safely, but expensive equipment cannot fix a poor location choice. Match your rod, reel, line, terminal tackle, and clothing to the water and species.
For most beginners, a 6- to 7-foot medium-light or medium spinning rod is flexible. Spinning reels are easy to cast and work well with monofilament, fluorocarbon, or braided line. A spincast combo is even simpler for young anglers because it helps reduce line tangles.
Experienced bass anglers may prefer a baitcaster for accuracy and heavier lures. Baitcasters can provide strong control, but beginners must learn to manage spool tension and backlash, which is a tangled spool caused by the line leaving faster than the lure pulls it.
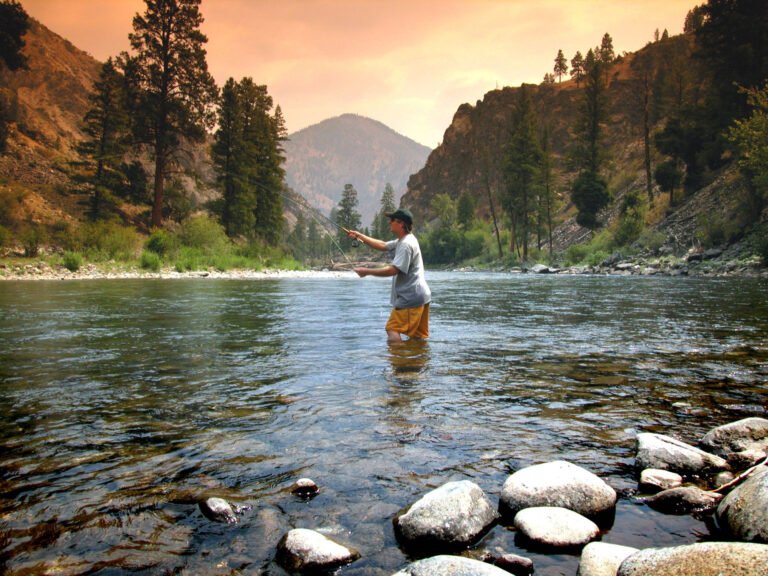
Fly anglers need a fly rod matched to the species and water. Trout often suit a 3- to 6-weight fly rod, while larger bass or saltwater species may need heavier gear. Check local conditions before choosing.

Rod and Line Pairings by Fishing Situation
These pairings are broad starting points. Adjust them for cover, lure weight, current, and fish size.
| Fishing situation | Rod and reel starting point | Line and terminal tackle |
|---|---|---|
| Panfish and small trout | 6- to 7-foot light spinning rod | 2- to 6-pound monofilament, size 8–12 hook |
| General freshwater | 6- to 7-foot medium spinning rod | 6- to 10-pound mono or braid with leader |
| Bass near cover | 6-foot-10 to 7-foot medium-heavy rod | 10- to 20-pound braid or fluorocarbon |
| Catfish from shore | 7- to 10-foot medium-heavy rod | 15- to 30-pound line, sinker, circle hook where legal |
| Surf fishing | 9- to 12-foot surf rod | 20- to 30-pound line, leader, sinker matched to waves |
| Kayak fishing | Compact spinning or baitcasting setup | Line suited to species, plus secure landing net |
Rod power describes how much force it takes to bend a rod. Action describes where it bends. Fast action bends near the tip, while moderate action bends farther down the blank. These features affect casting, lure control, and hook setting.
Do not select line only by breaking strength. Abrasion, knots, drag setting, cover, and fish behavior also matter. A leader is a short section between your main line and hook or lure. Fluorocarbon leaders can reduce visibility and resist abrasion. Wire leaders may help around toothy fish where legal.

Bring Tools That Make the Spot Easier
A small tackle box should hold hooks, sinkers, bobbers, swivels, lures, soft plastics, crankbaits, jigs, spare line, and a line cutter. Carry only what fits the location. A heavy box is a burden on a long hike.
Useful tools include needle-nose pliers, a landing net, measuring tape, hook remover, sunscreen, polarized sunglasses, and a small first-aid kit. Polarized sunglasses cut glare and help you see shallow structure, but they do not replace caution around hooks or water.
Saltwater anglers should choose corrosion-resistant tools and rinse reels, hooks, pliers, and lures with fresh water after each trip. Salt can damage bearings, drag parts, guides, and line connections. Dry gear fully before storage.

Choose the Best Time to Fish the Spot
A good spot changes with season, weather, light, water level, tide, and fishing pressure. Time your visit around conditions that suit the fish you target.
Spring often brings fish into shallow areas to feed or spawn, but local rules may protect spawning fish. Summer can push fish toward deeper water, shade, current, or low-light periods. Fall may bring strong feeding activity as water cools. Winter often favors slow presentations and deeper areas, though trout and some cold-water species may remain active.
Tides guide saltwater movement. An incoming tide may push bait onto flats or into creeks. An outgoing tide can concentrate food near cuts, points, drains, and creek mouths. Check tide tables and local reports rather than assuming every tide fishes the same.
Use a Simple Conditions Checklist
Before leaving, write down the conditions you expect. This helps you compare trips and spot patterns.
| Condition | What to check | How it may affect your plan |
|---|---|---|
| Weather | Wind, rain, air temperature, storms | Choose sheltered water during strong wind |
| Water | Temperature, clarity, level, flow | Change depth, color, and lure size |
| Light | Dawn, dusk, cloud cover, shade | Try shallow cover in low light |
| Tide | Incoming, high, outgoing, low | Focus on drains, flats, and current edges |
| Pressure | Crowds and recent fishing | Try less-used structure or smaller baits |
| Season | Spawn, migration, cold or heat | Follow species patterns and regulations |
Treat this table as a planning tool, not a promise. Fish may respond differently in each lake, river, bay, or beach.
Search a New Fishing Area Step by Step
A repeatable search helps you avoid wasting a full day in one unproductive place. Start with the highest-percentage features, then adjust based on signs from the water.
1. Confirm Rules and Access
Check the fishing license requirement, open seasons, size limits, bag limits, bait rules, hook restrictions, and access hours. Some waters restrict lead tackle, barbed hooks, live bait, spearfishing, or motor use.
Confirm rules with your state wildlife agency or local fisheries office. Regulations can differ between nearby lakes or sections of the same river.
📜 Check Local Regulations: Carry proof of your license when required. Follow posted rules, and release fish that are outside the legal size or bag limit.
2. Study a Map Before You Arrive
Mark points, creek mouths, channels, weed beds, bridges, ramps, piers, and public parking. Look for places where shallow water meets deep water.
If you own a boat or fish from a kayak, study hazards and navigation routes. A fish finder can reveal depth, bottom hardness, and structure, but it does not replace a map or careful navigation.
3. Walk the Bank or Observe From the Launch
Spend five to ten minutes looking before casting. Watch for baitfish, insects, birds, minnows, surface boils, current seams, and beds of aquatic plants.
Notice where other anglers cast, but do not crowd them. Their position may reveal structure, yet their success may depend on a lure, depth, or time window you cannot see.
4. Make High-Percentage Casts First
Start with visible cover, current edges, points, and depth changes. Cast parallel to the bank when possible. This keeps your lure in the strike zone longer.
Use a basic search bait, such as a small jig, spinner, soft plastic, or live bait under a bobber. Change one factor at a time. If you change location, depth, lure, and retrieve together, you will not know what caused a result.
5. Test Different Depths
Fish may be shallow, suspended, or near bottom. Begin shallow, then work deeper. A bobber can show a productive depth for live bait. A sinker or jig can help you feel bottom and locate drop-offs.
Count a lure down for a set number of seconds before retrieving. Note where you feel rocks, weeds, mud, or a hard bottom. These details help you rebuild the spot in your mind.
6. Record What You Learn
Keep a simple fishing log. Record date, location, weather, water clarity, water level, tide, lure, depth, and fish activity.
Photos of maps and shoreline features can help. Mark snags, safe parking, productive casts, and areas to avoid. Over time, your notes become more useful than a single online report.
Common Problems When Searching for a Spot
Many anglers search for fish but ignore access, conditions, or presentation. A few small mistakes can make a good location seem empty.
| Problem | Likely cause | Better response |
|---|---|---|
| No bites at visible cover | Fish are deeper or inactive | Test depth and slow the retrieve |
| Constant snags | Lure is too heavy or too low | Change angle, rig weedless, or use a float |
| Crowded shoreline | High fishing pressure | Visit at a different time or find nearby water |
| Muddy water after rain | Fish and bait shifted | Fish current edges and use vibration or scent |
| Line breaks near cover | Weak knot or poor abrasion resistance | Retie and use a stronger leader |
| Safe access is unclear | Private or restricted land | Confirm access before fishing |
| Fish spook near shore | Clear water or too much noise | Stay back and cast from low positions |
Do not stay in one place simply because it looked promising on a map. Give a spot a fair test, then move when the evidence says the fish are elsewhere.
Avoid Relying Only on Visible Fish
Seeing fish does not always mean they will bite. Fish may be spawning, stressed, feeding on tiny prey, or reacting to pressure. Surface activity can also come from small fish that are not your target species.
Use visible fish as one clue. Combine it with depth, cover, water temperature, forage, and current. If a location has no visible activity, it may still hold fish below the surface.
Do Not Confuse Popularity With Quality
A busy pier may be popular because it is easy to reach, not because it produces fish every day. A quiet bank may be quiet because access is poor, not because fish are absent.
Popularity still offers useful information. Anglers create paths, and local businesses often know which waters are legal and active. Just remember that pressure can change fish behavior and reduce available space.
Pros and Cons of Main Fishing Spot Types
Each water type has a place in an angler’s plan. The right option depends on safety, target species, gear, and access.
| Fishing spot type | Pros | Cons |
|---|---|---|
| Shoreline | Low cost, simple gear, easy for beginners | Limited range and possible private access |
| Pier | Stable platform, deeper water, family-friendly | Crowds, snags, and limited casting angles |
| Boat | Covers more water and reaches structure | Costs, launch skills, weather and safety risks |
| Kayak | Quiet access to shallow areas and cover | Needs PFD, balance, weather planning, and secure storage |
| Surf beach | Wide access and moving water | Waves, tides, wind, and heavy tackle |
| Ice | Reaches winter fish in open lake areas | Requires ice checks, cold-weather gear, and training |
| Fly water | Precise presentations and active learning | Steeper skill curve and specialized gear |
For children, shorelines, piers, and calm ponds are usually easier to manage. For experienced anglers, boats and kayaks expand access but increase the need for weather planning and safety skills.
Stay Safe While Exploring New Water
Safety should guide your spot choice. Check the weather, water level, current, tide, heat, and daylight before leaving. Tell someone where you plan to fish and when you expect to return.
Wear a U.S. Coast Guard–approved personal flotation device whenever you fish from a boat or kayak. A PFD is also smart near steep banks, strong current, cold water, or unstable docks. Use wading footwear with good traction, and never wade above a safe depth for your skill and equipment.
⚠️ Safety Warning: Check the forecast for storms and lightning. Do not fish from exposed shorelines during a storm. For ice fishing, check ice thickness in several places, avoid unknown ice, carry ice picks and a flotation aid, and take a recognized ice-safety course if you are new to the activity.
Protect Yourself From Hooks, Heat, and Cold
Keep hooks covered when walking through brush or boarding a boat. Use pliers to remove hooks, and do not hold a fish near its mouth unless you know the species is safe to handle.
Wear sun protection, drink water, and take breaks during hot weather. In cold conditions, use layers and keep spare clothing in a dry bag. Wet cotton can become dangerous when temperatures drop.
Children need close supervision near water. A child’s PFD should fit correctly and should not be used as a substitute for an adult watching the child.
Practice Conservation at Every Spot
Good fishing spots remain good only when anglers protect them. Handle fish with wet hands. Support the fish’s body, keep it out of the air for as little time as possible, and release it quickly when catch and release is required or chosen.
Use circle hooks for many live-bait situations when local rules and target species support them. Barbless hooks can make release easier and reduce injury. Do not leave monofilament, braided line, bait containers, or soft plastics on shore.
🌿 Conservation Note: Dispose of fishing line in a recycling bin or a marked line-collection container. Cut discarded line into short pieces if no collection point exists, and never leave it where birds or wildlife can reach it.
Respect spawning areas, aquatic plants, private property, and other anglers. Keep only legal fish that you plan to eat, and follow local cleaning and transport rules.
How Much Does It Cost to Find a Fishing Spot?
Finding a good local spot can cost very little. A basic setup may include a spincast combo, monofilament, hooks, sinkers, bobbers, bait, a small tackle box, and a fishing license.
More advanced fishing adds costs for a spinning reel, baitcaster, fly rod, fish finder, kayak, waders, landing net, and specialized lures. You do not need every item at once. Spend first on safety, legal access, dependable line, and gear suited to your target fish.
| Budget level | What it can cover | Best suited to |
|---|---|---|
| Low cost | License, basic combo, hooks, bobbers, bait | Beginners, kids, and local shore fishing |
| Moderate | Better spinning reel, tackle box, net, polarized glasses | Regular freshwater anglers |
| Higher | Quality rods, braid, fish finder, kayak or boat gear | Experienced anglers covering more water |
| Specialized | Fly outfit, surf setup, waders, ice shelter | Anglers focused on one water type |
Current pricing ranges from inexpensive starter kits to high-cost boats and electronics. Check the latest listing for updated features, warranty terms, and included items.
Who Should Use Which Fishing Spot?
Beginners should start with legal, calm, accessible water where a basic spinning or spincast combo works. A public pond, pier, or small lake can teach casting, knot tying, bait use, and fish handling without adding complex navigation.
Experienced anglers can search for less obvious features. Use contour maps, side-imaging sonar, water temperature, current, and seasonal patterns to locate fish that are not visible from shore.
Gift buyers should focus on the angler’s real use. A child may need a short spincast combo, small tackle box, polarized sunglasses, and a life jacket. A bass angler may prefer a gift card or specific soft plastics. A fly angler may care more about leader material and flies than a general rod combo.
| Angler | Best starting spot | Gear priority |
|---|---|---|
| Beginner | Public pond, calm lake, or easy pier | Simple spinning or spincast combo |
| Child | Safe dock, park pond, or managed lake | Short rod, bobber, safety gear |
| Bass angler | Weeds, docks, wood, points, drop-offs | Medium or medium-heavy rod and lures |
| Trout angler | Cold stream, stocked pond, or river pool | Light spinning or fly setup |
| Catfish angler | Deep hole, creek mouth, or current break | Strong line, sinker, bait, landing net |
| Surf angler | Beach cuts, troughs, and sandbars | Surf rod, leader, sinker, weather plan |
| Kayak angler | Protected coves and shallow structure | PFD, secure storage, compact tackle |
No category guarantees success. Water conditions, fish activity, skill, and local pressure still shape the result.
When to Ask a Local Tackle Shop or Guide
Ask for help when access is confusing, hazards are serious, or the target species is new to you. A local tackle shop can often explain current bait choices, legal areas, line strength, and seasonal changes.
A licensed guide can save time on large lakes, tidal water, remote rivers, and technical fly water. Guides also teach boat handling, fish finder use, drift control, and safe navigation.
Bring clear questions. Ask about public access, water level, safe parking, useful depth, current, and the best way to release fish. Avoid asking for another angler’s exact private spot without permission.
FAQs About Finding Fishing Spots
Q: What is the best way to find fishing spots near me?
A: Start with your state wildlife agency’s public access maps. Then check satellite images, lake maps, fishing reports, parks, piers, ramps, and local tackle shops. Confirm that the location is legal and open before you go. Choose a spot with fish habitat, safe access, parking, and conditions that suit your gear.
Q: How do I find fish in a lake from shore?
A: Look for points, creek mouths, weed edges, docks, rocks, fallen trees, and depth changes. Cast parallel to the bank, then test shallow and deeper water. Windblown banks may collect baitfish. A small jig, soft plastic, spinner, or bait under a bobber can help you search.
Q: Is a fishing pier better than a shoreline?
A: A pier can reach deeper water and provide a stable platform. It may suit beginners, children, and anglers without a boat. A shoreline can offer more room and less crowding. Choose based on species, access, safety, current, and available casting space.
Q: How can I find bass fishing spots?
A: Search for cover near a depth change. Good starting areas include weed lines, docks, wood, rocks, points, creek channels, and bridge supports. Use a medium or medium-heavy rod with line suited to the cover. Start with a search lure, then slow down around productive structure.
Q: What should I look for when fishing a river?
A: Look for current seams, pools, riffles, eddies, undercut banks, bridge pilings, fallen trees, and tributary mouths. Fish often hold where they can rest while food moves past. Check water level and flow before wading, and avoid strong or rising current.
Q: Are fishing reports reliable?
A: Reports are useful for finding patterns, but they are not guarantees. Weather, water level, fishing pressure, and bait movement can change quickly. Compare several reports and focus on repeated details such as depth, water clarity, lure type, and time of day.
Q: Do I need a fish finder to locate good fishing water?
A: No. A fish finder helps boat and kayak anglers map depth, bottom changes, and structure, but shore anglers can learn much from maps and observation. Watch current, cover, bait, water color, and shoreline shape. Learn to read water before buying electronics.
Q: What line should a beginner use when searching new spots?
A: Monofilament is the simplest starting choice for many beginners. Six- to 10-pound test covers many freshwater uses. The correct line depends on species, cover, lure weight, and local conditions. Use a leader when abrasion or reduced visibility matters.
Q: How do I know if a fishing spot is private?
A: Check posted signs, property lines, park rules, access maps, and local agency information. Do not assume that public water grants permission to cross private land. Ask the landowner or contact the park or wildlife office when access is unclear.
Q: What makes a good fishing spot for kids?
A: Choose calm water with flat ground, safe parking, shade, restrooms, and room to cast. A public pier, managed pond, or small lake often works well. Use a short spincast combo, bobber, small hook, and simple bait. Keep hooks, knives, and water edges under close adult supervision.
Q: How often should I move if I catch nothing?
A: Give a location a fair test by trying different depths, angles, and presentations. If you find no signs of fish after changing one factor at a time, move to the next feature. Keep notes so the move teaches you something instead of becoming a random search.
Final Advice for Finding Better Fishing Spots
The best fishing spot is not always the most famous one. It is the legal, safe, accessible place where the target fish can find food, cover, oxygen, and suitable water. Learn to identify those features, then test them with simple gear and a clear plan.
Start close to home. Use maps and local reports, but verify everything at the water. Watch the wind, current, depth, structure, bait, and light. Keep a fishing log, protect fish during release, clean your gear, and respect other anglers and property owners.
With time, you will stop seeing a lake or river as one large body of water. You will see points, seams, edges, channels, shade lines, feeding paths, and safe access routes. That change in how you read water is the real key to finding better fishing spots.